The first thing we need to do is to download MetaMask wallet, for this we go to the App Store (for iPhone) or Play Market (for Android) and download the necessary application by name.
After downloading and launching the application Create a new wallet
Set a password
It's optional. Whoever wants to, can put a seed-phrase protection for their safety. Those who want can skip this step.
On the main screen, the first thing to do is to change the network. Select Ethereum Main Network
After changing the network, we need to get ETH, for this we click on Ethereum
Scroll to the bottom and you will see the "Get" button. Click it, copy your address to receive ETH
Then we go to the exchange where we previously bought the ETH coin on the spot (ByBit for example), click on it and click on the "Withdraw" button
After that the withdrawal window opens, in the address line we insert the wallet address, which we copied in MetaMask, choose the ERC20 network, enter the withdrawal amount and click on the "Withdrawal" button, then confirm it and wait for the receipt on MetaMask wallet.
On the home page, go to your browser and type "Uniswap" in the search or paste the link:
https://uniswap.org
If you wrote "Uniswap" in the search, now click on the link that is shown in the screenshot.
Next, we go to the Uniswap homepage and click on "Launch App" and then connect our wallet.
Next, click on the gear on the top right, and then set the settings as shown on the screenshot.
Enter all settings exactly as mentioned on this screenshot then close the settings window
After that click on the "Select Token" button
Insert the ESP contract address into the input field and press Espresso Systems
0x2C9c748fE550C11Ff1ed5Df8822d7dbB7A86DE9e
Before buying, we are warned that ESP is not yet traded on centralized US exchanges, and that ESP presale has only recently started. As a matter of fact, this is true, so we click "I understand"
Next, we go to the ESP purchase page. Write an amount and then click on the "Swap" button
After a couple minutes we see the successful exchange status. Congratulations, you have just purchased your ESP coins
Great, coins have been purchased
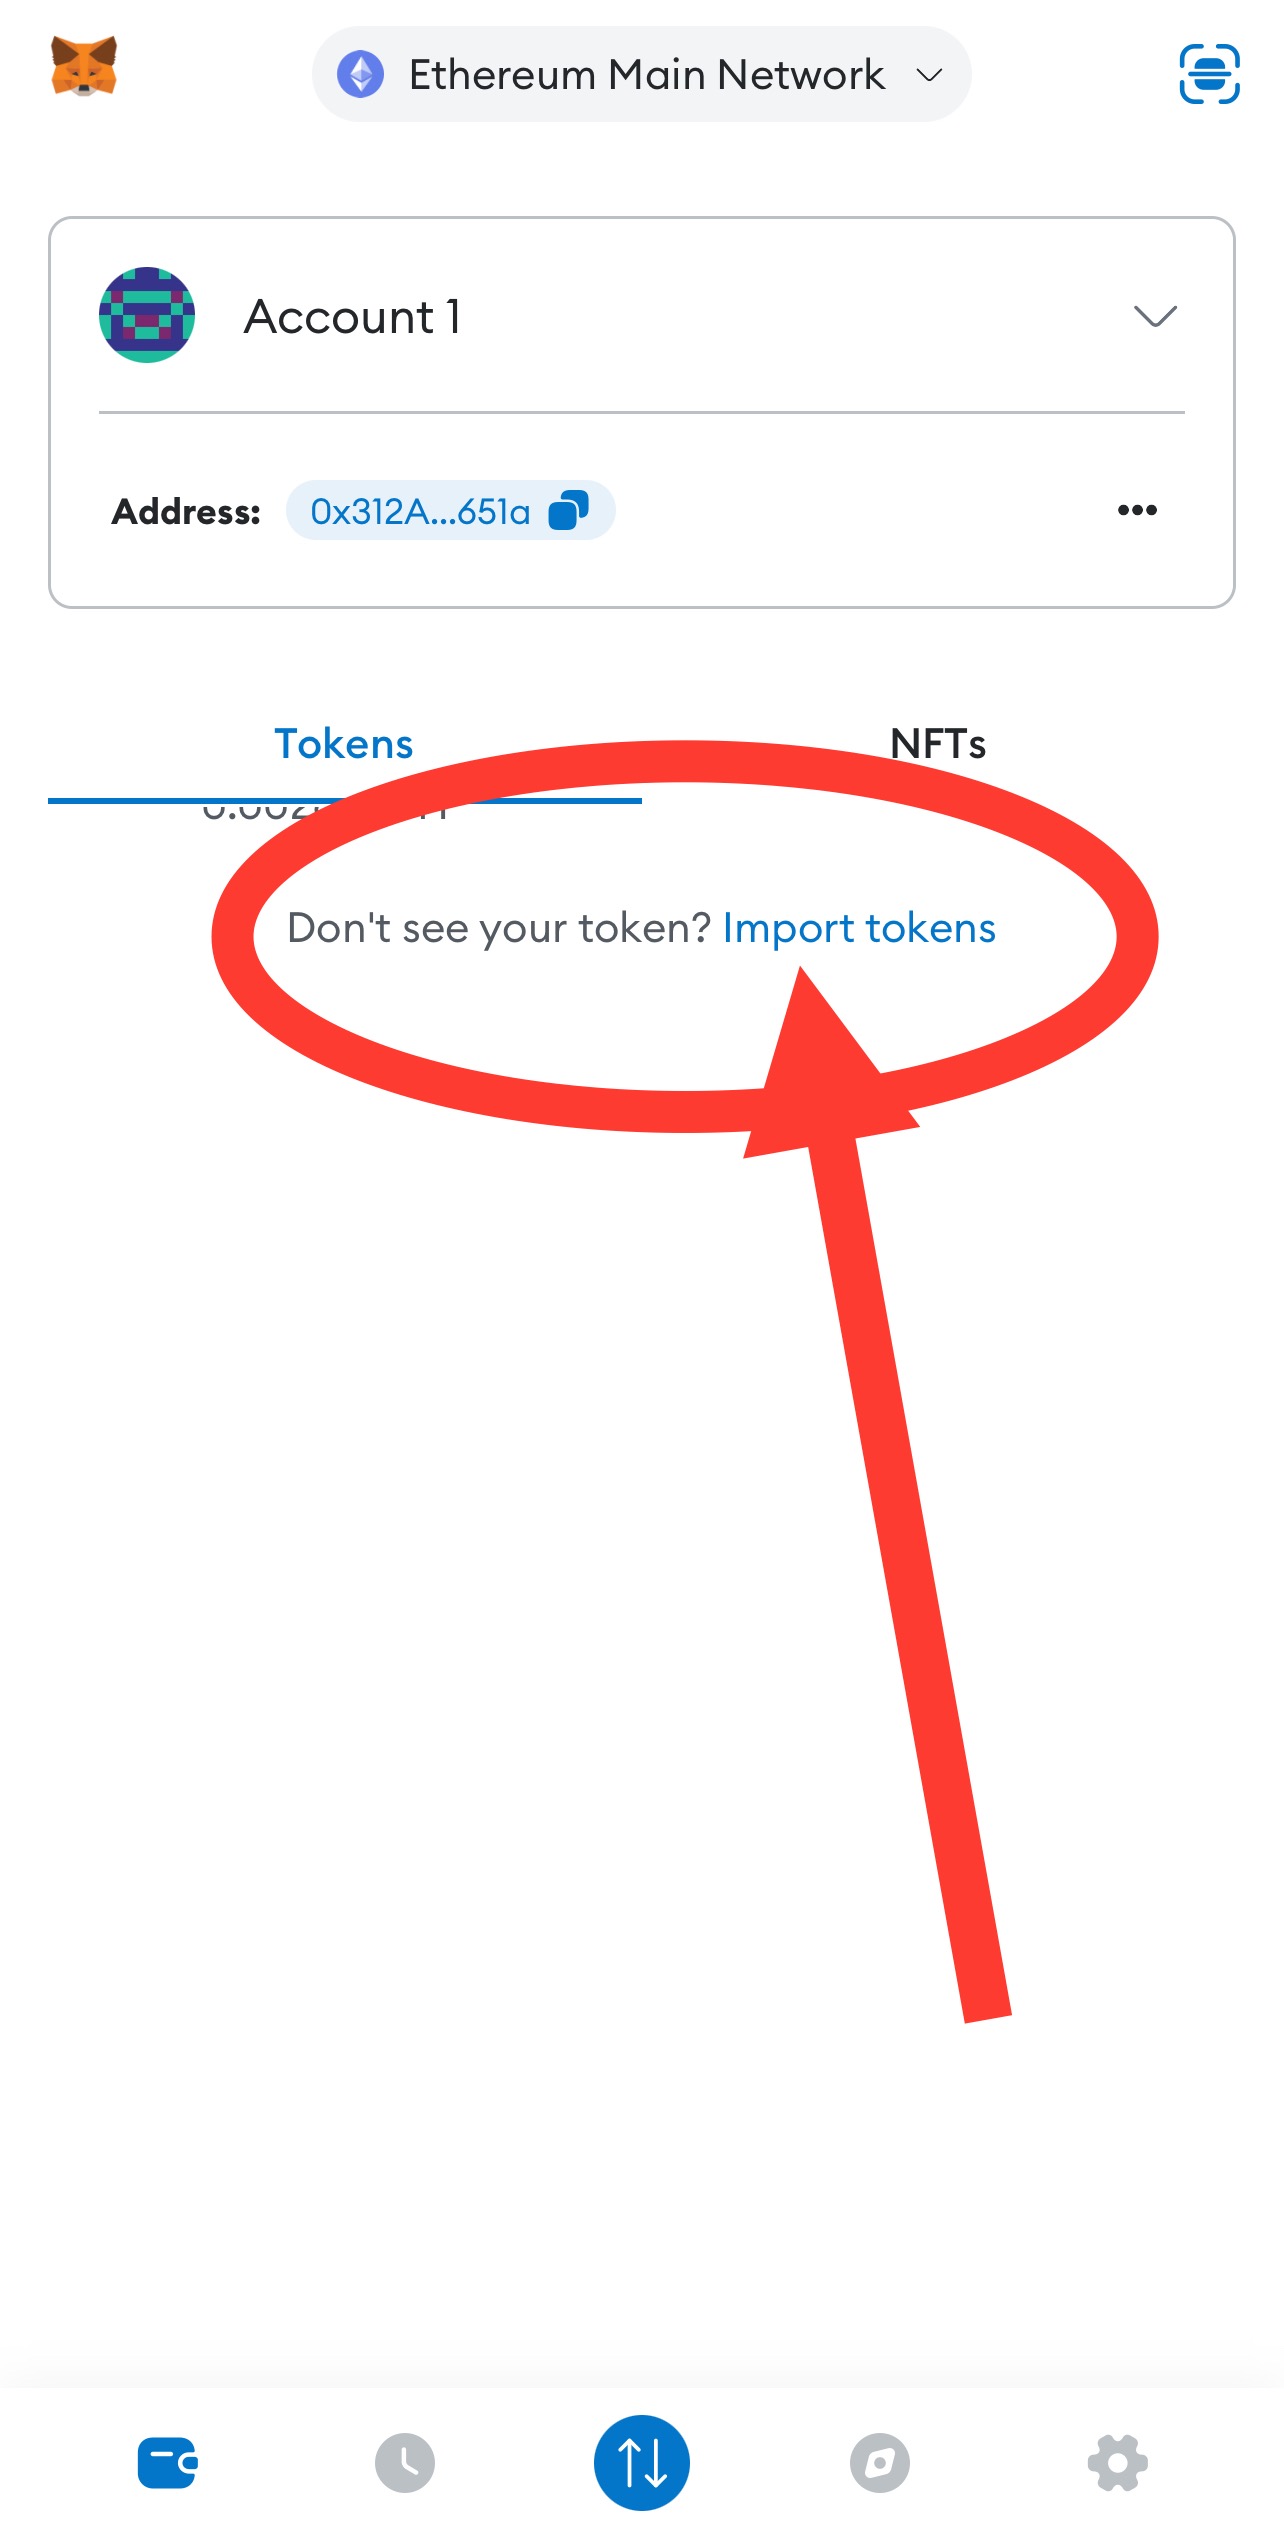
Now let's figure out how to add them to your wallet to keep track of the price
On the main page, click "Import tokens".
Select the custom token, then enter the ESP address