Deploying Telegram Bots
Dolphin MulugetaSo, you've built an awesome Telegram bot, and now you're ready to unleash it upon the world? Great! This guide will walk you through deploying your bot using server-less functions with Vercel – a fast, efficient, and practically free way to get your bot up and running. No server management headaches required!

Telegram supports two ways of interacting with the messages that users send to its bots. One is long-polling and the other is webhooks, we can go in detail to discuss which one is better, but today we're focusing on deploying with webhooks and the magic of serverless functions.
What You’ll Need:
- A Telegram Bot: Create one using the BotFather on Telegram. You’ll need your bot’s API token.
- A Vercel Account: Sign up or log in to your Vercel account.
- Your Telegram Project Built with Typescript or Javascript (Optional): If you don't have one, we've got you covered with some handy templates!
🚨 Notice:
This article provides a comprehensive guide on deploying Telegram Bots using a readily available template. While the template is ideally suited for users commencing new bot development projects, its utility extends to existing projects as well. The template has been designed with a flexible structure that permits the seamless integration of pre-built bot projects. Developers with ongoing or completed projects can simply incorporate their existing code-base into the provided template framework.
Getting Started:
Choose Your Language: (Javascript or Typescript)
Clone the Template: Use Git to clone the template to your local machine:
git clone <link to selected template>
Install Dependencies: Navigate into your project folder and install the necessary libraries:
cd template-file-name
npm install
Configure Your Bot:
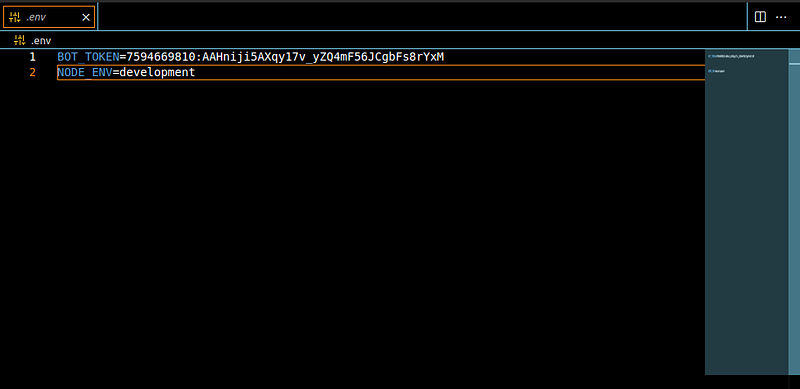
Create a new file named .env based on the provided .env-sample file. This file will store your bot’s secret API token and the node environment. Open .env and replace the placeholder value with your actual token obtained from BotFather.
Sample .env file should look something like this
The Magic: Customize Functionality! ✨
Customize Functionality (Here’s the Magic!): The template comes with a basic structure. Now it’s your turn to personalize it!
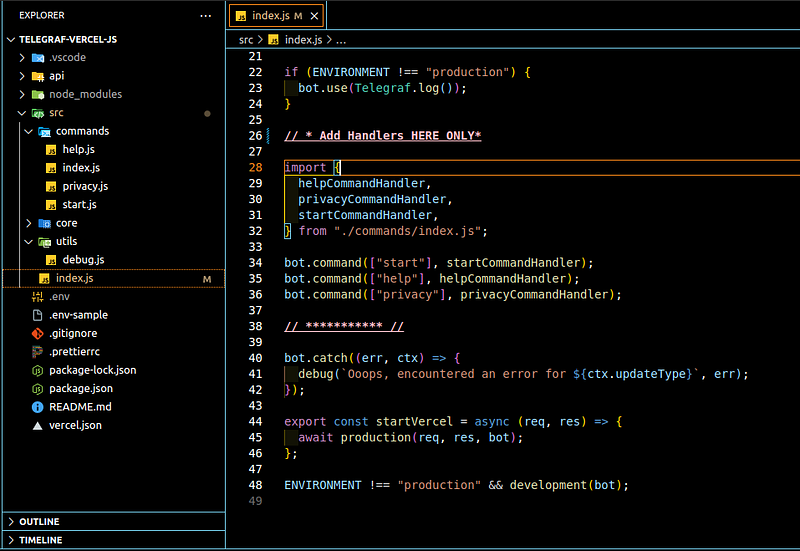
- src/commands: This folder holds the brain of your bot’s functionality. Each file in this folder represents a command your bot can understand. For example, a start.js file might handle users initiating a conversation.
- Create new files within the src directory to handle your specific needs of your bot or you can copy the implementations of the bot you have already programmed and want to deploy.
- Add your own handlers into the index.js/index.ts file for the bot to handle the requests for your implementations.
Run in Development Mode (Optional): (This step allows you to test your bot locally before deploying) Run the bot in development mode using:
npm run dev

This will start the bot locally and allow you to interact with it directly using Telegram.
Warnings
⚠️ The template is structured for Vercel's server-less functions.The following files and folders indicated by “❌” are highly advised not to be altered.
telegraf-vercel-js/
├── api/
│   └── index.js❌
├── node_modules/
├── src/
│   ├── index.js
│   ├── commands/
│   │   ├── help.js
│   │   ├── index.js
│   │   ├── privacy.js
│   │   ├── start.js
│   ├── core/
│   │   ├── development.js❌
│   │   ├── index.js❌
│   │   └── production.js❌
│   ├── utils/
│   │   ├── debug.js ❌
├── .env-sample
├── .gitignore
├── .prettierrc
├── package-lock.json
├── package.json
├── README.md
├── tsconfig.json ❌
└── vercel.json ❌
Push to GitHub
To ensure seamless deployment to Vercel, it’s crucial to host your project’s source code on a version control system like GitHub. This step allows Vercel to access and deploy your project automatically.
Here’s a step-by-step guide:
Create a GitHub Repository:
- If you haven’t already, create a new GitHub repository.
- Choose a descriptive name for your repository that reflects your project’s purpose.
- Clone your Repository
- Copy your project to your new Repository
Stage Your Project Files:
- Add all project files to the staging area:
git add .
Commit Your Changes:
- Commit the staged changes with a clear message
- You can replace “Initial commit” with a more specific message describing your changes.
git commit -m "Initial Commit"
Push your local repository to the remote GitHub repository:
git push
Once your project is pushed to GitHub, you can proceed with the Vercel deployment process. Vercel will automatically detect the changes and deploy your project.
Additional Tips:
- Clear Commit Messages: Use descriptive commit messages to track changes and make your project history easier to understand.
- Regular Commits: Commit your changes frequently to maintain a clean project history and facilitate collaboration.
- Branching Strategy: Consider using a branching strategy like Gitflow to organize your development workflow and manage different features or bug fixes.
By following these steps, you’ll ensure that your project is accessible to Vercel and can be deployed efficiently.
Deploy to Vercel:
- Click Continue with GitHub if you haven't worked with GitHub previously
- Then "Add New Project."

Search Repository you want to deploy and import it

After selecting the Repository you should get something like this
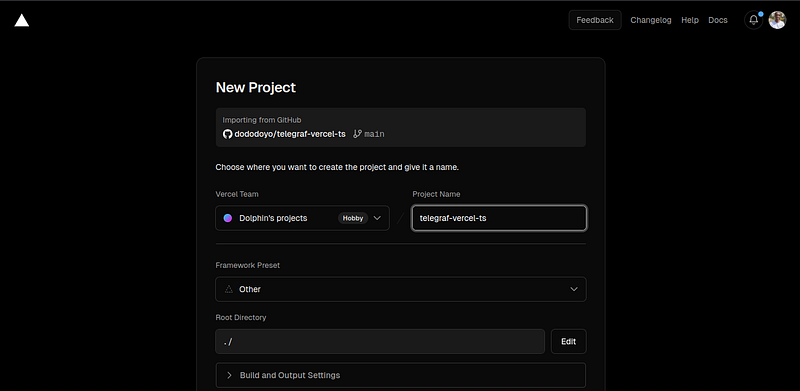
Keep everything as default [Framework Preset, Root Directory, Build and Output Settings] except for Environment Variables
- Change Environment Variables
Add your BOT_TOKEN provided by Telegram.
Make sure NODE_ENV is set to production (all small letters).

Notice: Environment variables can have be many based on the complexity of your bot like database_uri third party apis, etc make sure you add your environment variables required by your implementation.
- Hit Deploy
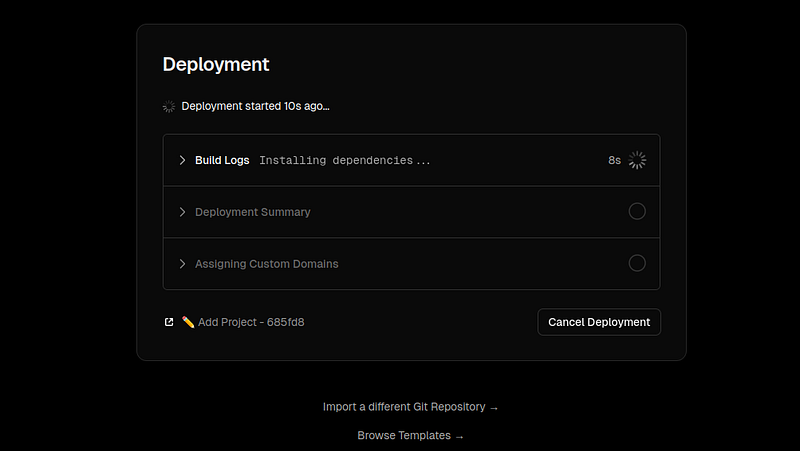
After a successful deployment you should see something like this.
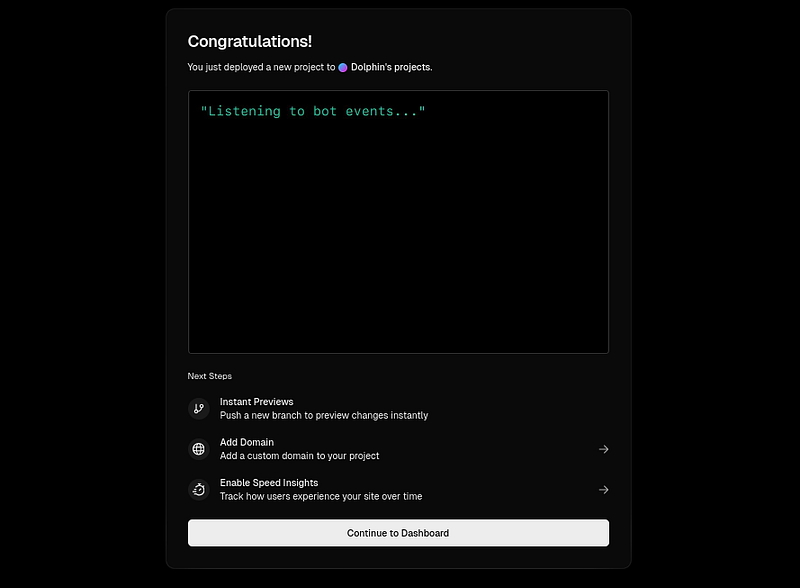
- Hit Continue to Dashboard
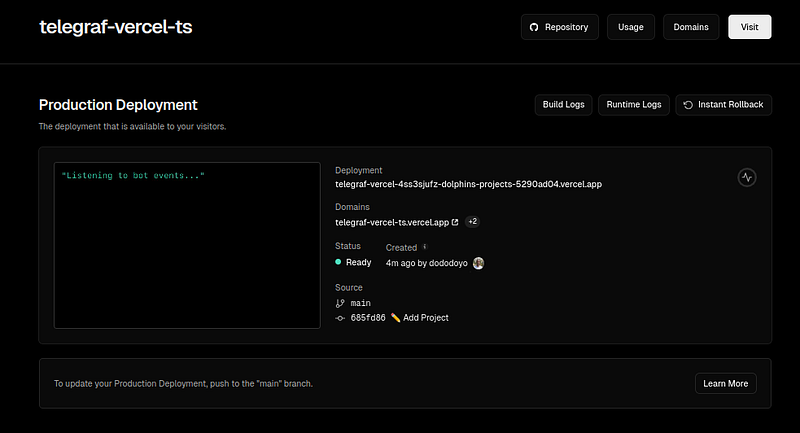
- Right Click on Visit copy the deployment URL – we'll need it soon.

Connect Your Bot:
Now the server-less function is running on Vercel we must update Telegram where to send requests from our bot to our server-less functions by setting our bot’s web-hook.
- Set Webhook for your bot (make sure you stopped the bot in development locally)
- We will uses telegrams native Bot-API to set the web-hook of our telegram bot.
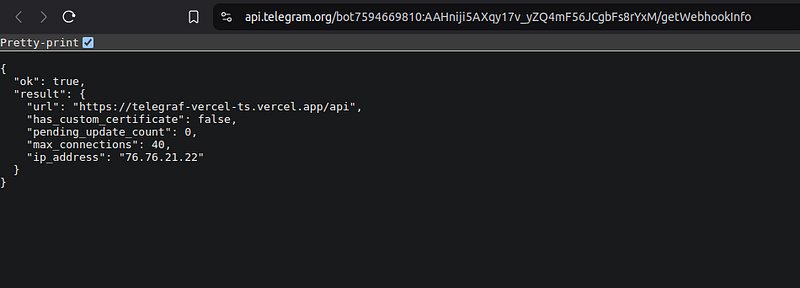
- Make sure there is no previously assigned web-hook for the bot, You can do this using getWebhookInfo method of the Telegram Bot API.
https://api.telegram.org/bot<BOT_TOKEN>/getWebhookInfo
It should look like something like this.
https://api.telegram.org/bot7594669810:AAHniji5AXqy17v_yZQ4mF56JCgbFs8rYxM/getWebhookInfo
If your Telegram bot was already set you will see something like this
if not you will see something like this

Either way when we set the new web-hook everything will be fixed.
Set Web-Hook:
https://api.telegram.org/bot<BOT_TOKEN>/setWebhook?url=<SERVERLESS_URI>/api
It should look like something like this
https://api.telegram.org/bot7594669810:AAHniji5AXqy17v_yZQ4mF56JCgbFs8rYxM/setWebhook?url=https://telegraf-vercel-ts.vercel.app/api
⚠️ Don’t forget the /api at the end of your server-less function url

Testing Your Bot:
- Check Function Logs: Go to your Vercel project and click “Logs.” You should see logs from your bot’s interactions with the Telegram API.
- Send Messages: Test your bot by sending messages to it on Telegram. It should respond as expected with the functionality you implemented in the command files.

Each Interaction should Correspond to a POST request in the Runtime Log.

Notice the similarity of time [00:51] in the interaction with the bot and server log.
Additional Tips:
- Error Handling: Implement robust error handling in your bot to catch and log exceptions.
- Security: Keep your bot token secret and avoid exposing it in public repositories.
- Performance Optimization: Optimize your bot’s code to minimize response times and reduce costs.
- User Experience: Design your bot to be user-friendly and provide a seamless experience.
By following the steps written above we can leverage the power of server-less functions and Vercel, and deploy Telegram bots that are both powerful and easy to manage.
Written with ❤️ By Dolphin Mulugeta