DIY Cultured Stone A Comprehensive Guide to Creating Custom Stone Veneer
Introduction
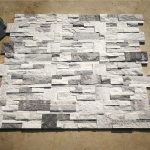
Cultured stone, also known as manufactured stone or faux stone, is a popular choice for homeowners and builders looking to add a touch of elegance and sophistication to their interior or exterior spaces. Cultured stone is a cost-effective alternative to natural stone, offering the same aesthetic appeal without the high price tag. In this comprehensive guide, we will explore the world of DIY cultured stone, providing you with step-by-step instructions on how to create custom stone veneer for your home or project.
Chapter 1: Understanding Cultured Stone
Before we delve into the DIY process of creating cultured stone, it's important to understand what cultured stone is and the benefits it offers. Cultured stone is made from a mixture of cement, aggregates, and pigments that are poured into molds to create realistic stone replicas. These molds can mimic various types of natural stone, such as limestone, slate, or granite, giving you a wide range of design options to choose from.
One of the main advantages of cultured stone is its versatility and ease of installation. Unlike natural stone, which can be heavy and difficult to work with, cultured stone is lightweight and can be easily cut and shaped to fit any surface. This makes it an ideal choice for DIY projects, as it can be installed by homeowners without the need for professional masons or contractors.
Cultured stone is also more affordable than natural stone, making it a budget-friendly option for those looking to enhance the look of their home without breaking the bank. Additionally, cultured stone is durable and low-maintenance, requiring minimal upkeep to maintain its appearance over time.
Chapter 2: Choosing the Right Materials
Before you begin the DIY process of creating cultured stone, you will need to gather the necessary materials and tools. Here is a list of essential items you will need for this project:
- Cement: Portland cement is commonly used for creating cultured stone due to its strength and durability.
- Aggregates: Sand, gravel, or crushed stone can be added to the cement mixture to provide texture and strength.
- Pigments: Coloring agents are used to give the cultured stone its desired hue and mimic the natural variations found in real stone.
- Mold: Silicone molds are typically used to create the shape and texture of the cultured stone.
- Mixing container: A large bucket or wheelbarrow is needed to mix the cement, aggregates, and pigments.
- Mixing tools: Shovels, trowels, and mixing paddles are essential for blending the materials together.
- Protective gear: Gloves, safety glasses, and a dust mask should be worn to protect yourself from potential hazards.
- Sealer: A sealant can be applied to the finished cultured stone to protect it from moisture and stains.
Chapter 3: Preparing the Work Area
Before you can start creating your cultured stone, you will need to prepare the work area to ensure a smooth and efficient process. Here are the steps to follow:
1. Select a well-ventilated area: Cultured stone production can generate dust and fumes, so it's important to work in a space with good air circulation.
2. Stone veneer for DIY home improvement down protective coverings: Use plastic sheets or drop cloths to protect the floor and surrounding surfaces from spills and splatters.
3. Set up your work station: Place your mixing container, molds, and tools within easy reach to streamline the production process.
4. Ensure proper lighting: Adequate lighting is essential for working with precision and accuracy, so make sure your work area is well-lit.
Chapter 4: Mixing the Cultured Stone Ingredients
Now that you have gathered your materials and prepared your work area, it's time to start mixing the ingredients to create your cultured stone. Follow these steps to ensure a successful mixing process:
1. Measure out the ingredients: Use a scale or measuring cups to accurately portion out the cement, aggregates, and pigments according to your desired recipe.
2. Combine the dry ingredients: In your mixing container, blend the cement and aggregates together until they are evenly distributed.
3. Add water: Slowly pour water into the mixture while stirring continuously with a shovel or mixing paddle. The consistency should be thick and workable, similar to oatmeal.
4. Mix thoroughly: Continue mixing until all the ingredients are fully incorporated and there are no lumps or dry patches in the mixture.
5. Adjust the consistency: If the mixture is too dry, add more water; if it is too wet, add more cement or aggregates until you achieve the desired consistency.
Chapter 5: Pouring the Mixture into Molds
With your cultured stone mixture ready, it's time to pour it into the molds to create the stone veneer. Follow these steps to ensure a successful pouring process:
1. Prepare the molds: Apply a release agent, such as cooking spray or mold release oil, to the inside of the silicone molds to prevent the cultured stone from sticking.
2. Fill the molds: Using a trowel or scoop, carefully pour the mixture into the molds, ensuring that they are filled to the top and all air pockets are removed.
3. Tap the molds: Gently tap the molds on a flat surface to release any trapped air bubbles and ensure that the cultured stone is evenly distributed.
4. Smooth the surface: Use a trowel or spatula to smooth out the top of the molds and create a clean finish on the cultured stone.
Chapter 6: Curing and Demolding the Cultured Stone
After pouring the mixture into the molds, the cultured stone will need time to cure and harden before it can be demolded. Follow these steps to ensure a successful curing and demolding process:
1. Allow the cultured stone to cure: Place the molds in a dry, well-ventilated area and allow the cultured stone to cure for at least 24 to 48 hours, depending on the temperature and humidity levels.
2. Test for hardness: To check if the cultured stone is fully cured, gently press your finger onto the surface. If it feels firm and solid, it is ready for demolding.
3. Demold the cultured stone: Carefully peel back the silicone molds to reveal the finished cultured stone veneer. If the stone sticks, gently flex the mold to release it without damaging the stone.
4. Trim and shape the cultured stone: Use a utility knife or saw to trim any excess material and shape the cultured stone to fit your desired dimensions.
Chapter 7: Finishing and Installing the Cultured Stone
Once you have demolded and trimmed the cultured stone, it's time to finish and install it in your desired location. Follow these steps to ensure a successful finishing and installation process:
1. Sand the edges: Use a sanding block or sandpaper to smooth the edges of the cultured stone and remove any rough spots.
2. Apply a sealant: To protect the cultured stone from moisture and stains, apply a sealant using a paintbrush or roller. Allow the sealant to dry completely before installation.
3. Install the cultured stone: Using a construction adhesive or mortar, affix the cultured stone to the desired surface, pressing firmly to ensure a strong bond.
4. Grout the joints: Fill in any gaps between the cultured stones with grout to create a seamless and polished look.
5. Clean and maintain: Once the cultured stone is installed, clean it regularly with a mild soap and water solution to keep it looking its best.
Conclusion
Creating your own DIY cultured stone is a rewarding and cost-effective way to enhance the beauty of your home or project. By following the step-by-step instructions outlined in this guide, you can create custom stone veneer that rivals the look of natural stone at a fraction of the cost. Whether you're looking to add a touch of elegance to your interior walls or enhance your outdoor living space, DIY cultured stone offers endless possibilities for creativity and customization. So gather your materials, roll up your sleeves, and start creating stunning cultured stone that will impress for years to come.