Connecting a DeFi wallet to an exchange. Step-by-step guide
voyager1First things first - what is even this Trust Wallet?
Well, Trust Wallet is a secure decentralized wallet focused mainly on Etherium-based tokens. With help of this tool, you can easily buy, store, exchange and earn cryptocurrency – for now, there are over 160 currencies available to use.
But another coin is coming soon - the new decentralized NMX. As such, Trust Wallet is one of the options that very soon will be available to connect to Nominex and Uniswap, so today we will provide you with a step-by-step guide to registering with Trust Wallet, as well as tell you a few words about Wallet connect.
Trust Wallet Benefits
Trust Wallet supports all main cryptocurrencies as well as a lot of additional ones. The developers claim support for 40+ blockchains and 300,000 varieties of tokens and coins. In practice, there are wallet connections available for about 60 different coins. In addition, you can click on "Add token", select one of 10 networks (ETH, VeChain, etc.) and specify the data required to connect the required token. In the future, this function will be needed to add a custom NMX token to our Trust. All you need to do is enter the token symbol, contract address and decimals (you can learn more about this in the following articles).
Why would you need to connect it?
Before you start making more money from farming, there are a few steps to follow.
- To get started, you need to buy new NMX DeFi tokens. Where to store them? DeFi wallet, of course. Such, for example, as Trust Wallet, Metamask, or others. Some prefer Meta, others prefer Trust ... By the way, if you want to use Metamask - read this article.
- Secondly, after purchasing NMX you will also need some USDT crypto dollars, because you can only add NMX to the liquidity pool together with USDT. It’s just how things are. Not a bad option at all! Some projects, for example, do the same with DAI, USDC, wETH and some other crazy currencies!
- After that you can start connecting your DeFi wallet to Uniswap or Nominex. But since we are currently working on the DeFi functionality, you can only connect it to Uniswap and follow the next steps there, but not before the distribution starts.
- Are you all connected? Okay, now you can buy and sell any amount of NMX available on the exchange for USDT. Then, add to a liquidity pool... wondering what is it? We'll tell you later! For now, just remember that only an equal number of tokens can be added to liquidity. For example, if NMX costs $ 1, then you need 1 NMX and 1 USDT. Always 50/50.
- For this provision of liquidity, you receive the NMX-LP as a smart contract guarantee. These NMX - LPs will also be kept in your wallet. The moment you want to withdraw money from liquidity, you must return all received NMX-LP from the Uniswap exchange wallet and receive NMX and USDT back. Until then, you can connect your wallet to Nominex and stake NMX-LP on the exchange for as long as 100 years. This will bring you even more NMX Tokens as a reward for providing liquidity. Also, they can be sold immediately. Just how you exchange NMX back to USDT.
Simple, huh? Okay, don't worry! We will tell you everything. The main thing for you to know - it’s not us who came up with this complicated stuff! This is how the entire DeFi works.
But we've gone too far into the Mordorian forest of strange terms. Let's go back to the basics and show how to connect the Trust wallet to the Uniswap exchange.
Step 1:
First of all, go to TrustWallet.com to familiarize yourself with the product, and choose the option you need: iOS or Android

Step 2:
Launch the app once it's downloaded. Click on “Create a new wallet”. A screen with the Terms of Usage appears. Once you’ve read it, place a tick in a tickbox below.


Step 3:
After doing this, you will see the following screen. Essentially, this step is explaining to you that in the next step of registration you will see 12 words that will allow you to restore your wallet (for example, when reinstalling the wallet on another smartphone and other circumstances). This means, that now you will need to write down the secret phrase.
Spoiler alert: taking a screenshot is not a safe way to store your secret phrase!

Step 4:
Now, you will be asked to enter your secret phrase to ensure that you took a note of it. Once you enter the words in the right order – press continue and you’re good to go.
Warning: it is crucial you do write your secret phrase down! Double, triple, and quadriple-check! Voilà!
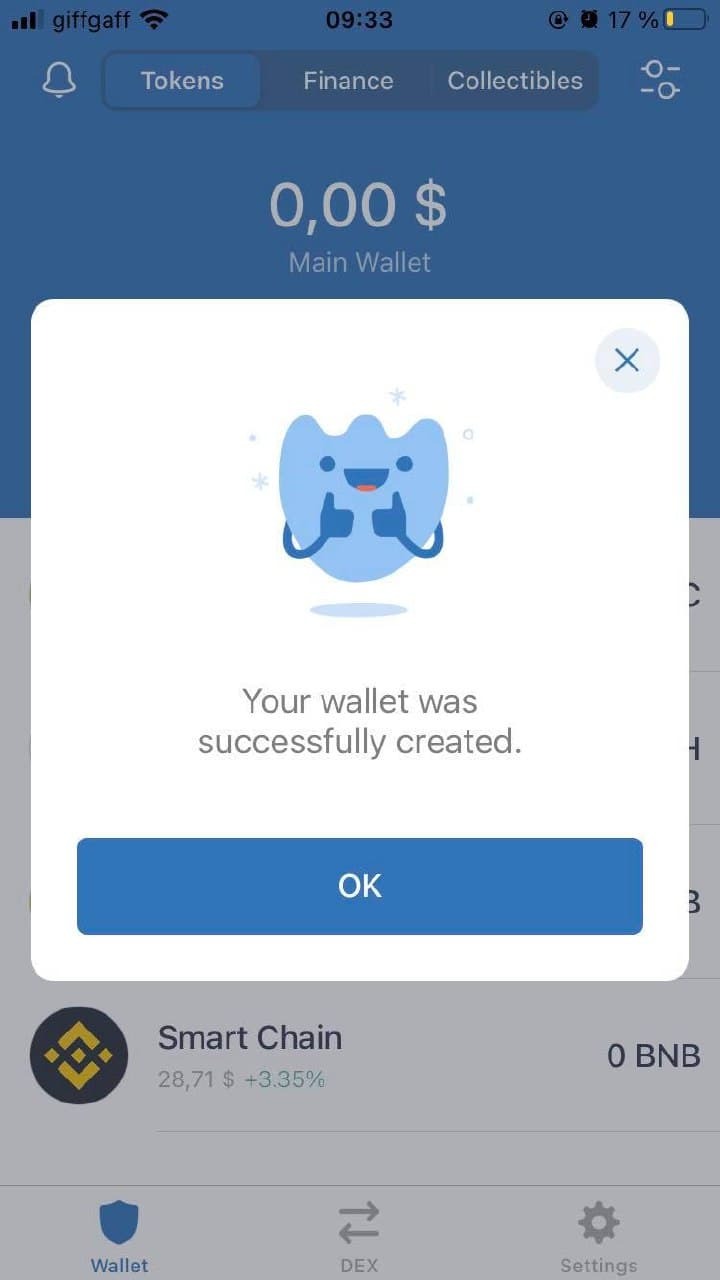
Let's take a look at what we see in the wallet and what we are going to use in the future.
The "overview" section is where we can see our balances. There, you can also find information about staking and a menu for adding new coins (small icon at the top right). It is in the overview section (under the "Tokens" tab) that you can get addresses for receiving assets or sending them.
Trust Wallet supports staking of some coins (currently XTZ, TRX, ATOM, ALGO, KAVA). The submenu “Finance” is dedicated to staking. But that's not what we're interested in.

The wallet supports the exchange of a number of coins through the appropriate interfaces: quick exchange and a full-fledged trading interface.
But it is still difficult to say how reliable buying crypto for fiat is. The experience of a number of other wallets with built-in "exchangers" makes us wary of this possibility. In fact, in such cases, the exchange is carried out in some exchange "mega-services" affiliated with the developers (like Changelly or Shapeshift), which, despite their large size, can work with numerous glitches, beat with a KYC-sledgehammer and react rather sluggishly to claims.
Well, this was a quick tour of the wallet. Now let's get back to business.
Step 5:
Now what? you may ask. You can learn about how to use Wallet Connect, a protocol that connects dApps and mobile wallets, to maximize your trading potential.
Log into your Trust Wallet and go to “Settings” at the bottom right corner. This will bring you to the following screen.
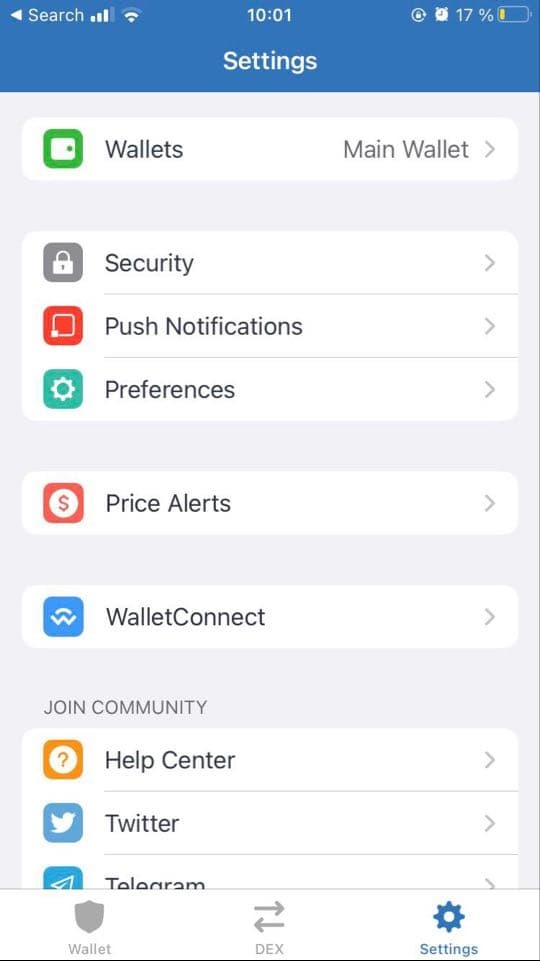
Click on WalletConnect. Doing so will transfer you to a QR-code scanner.
Step 6:
Open your Uniswap account (you should have one by now or you will be able to swap token on Nominex a bit later). Then choose “Connect Wallet in the top right corner.

That will show you a pop-up window, where you will be able to choose which wallet to use. In this case, we’re choosing WalletConnect.

Step 7:
You can now see the QR code you need to scan. Go ahead and use the QR scanner on your phone to proceed. Here you go! If you do everythig right, the following message will appear:

And that's simply it!
Now you can go back to Uniswap and add the tokens to the liquidity pools taking them from Trus wallet.

Step 8:
Let's buy our first cryptocurrency. To do so, we will need to go back to the application and select the tokens that we want to purchase. In this case, we will use UNI. Why UNI and not NMX? Because NMX is not yet listed on UNI, and besides NMX, UNI is the simplest example!

Step 9:
Once ready, click the "Swap" button. You will be prompted to confirm the transaction. After confirmation, wait for the message that the transaction was completed and your exchange can be considered completed.

That's it! Do the same later with NMX!
FAQ
—What is the best way to protect my Trust Wallet?
Do not download the application from questionable sources. Download it in the official Google Play and App Store stores by following the links indicated on the official website or in this article.
Update the application in a timely manner, track information on possible detection of critical vulnerabilities in the wallet.
ALWAYS enable passcode in the app settings, and also protect the device itself.
Do not install dubious programs on your device, and also try not to visit suspicious sites or generally refrain from surfing on this device. Your crypto is stored on it!
If you store significant amounts in certain assets, consider using the device only for your wallet and nothing else.
Store your recovery phrase in a safe place. Do not share it with anyone (not even "support staff"), and do not enter it on any sites.
—The transaction was not made. Why?
Make sure you have enough coins to pay the fees. Oooooh ... We need to talk about fees separately! Please note that when sending tokens you often have to pay a feein the underlying asset (for example, to send USDC running on the ETH blockchain, you can only pay the commission in ETH). It is also possible that the wallet of this asset has not yet been synced to the network. Finally, make sure your internet is working.
- I did not save the seed during the installation. How do I know what it is?
Settings - Wallets - select the needed wallet (usually the first one) - click on three dots - show the secret phrase
- What is the difference between a private key and a seed phrase? How do I get a specific private key?
There is only one seed phrase for a particular wallet. Based on it, billions of private keys (private keys) are generated for each coin (although few of the keys are actually used, most are waiting in line). Each key corresponds to a specific address where coins can be. The sum of the contents of all addresses is what you see as the balance of the corresponding coin. To export the contents of a specific address to another wallet, you should not enter the entire seed phrase as a whole (although this is one of the possible methods), it is better to use the private key from this address. To obtain a key, with all the precautions (disconnecting the Internet, etc.), use one of the services that allow you to get keys from a seed, for example.
- I cannot solve my problem. How do I get help?
You can find the "Support Center" in your wallet settings. Then you can read the FAQ articles, ask a question on the forum (there is also a Russian-language section), or even try to reach the wallet support (one says they only communicate in English or Chinese). You can also ask your question in this thread, on the bits.media forum.