Complete HTML Form Elements Guide
Empty | My telegram channelCreating an HTML form is an integral part of the site and an important skill of web developers. Use this guide to explore the elements of HTML forms.

Introduction
HTML forms are required to collect data from site visitors. For example, when registering for Uber, Netflix or Facebook, the user enters his name, mail and password.
Note: In the examples below, CSS styles are already set, so they are different from what you get. CSS files can be downloaded from here:
Form element
The Form element (<form> </ form>) wraps all the elements inside the HTML form.

Attributes:
- action is the web address (URL) of the program that processes the form data.
- Method is the HTTP method that the browser uses to submit the form.
- Possible values: POST or GET. POST - sends the form data to the server.
- GET - the data is sent inside the URL, the parameters are separated by a “?”.
Note: You cannot create a form inside a form. That is, the use of the <form> element inside another <form> element is not allowed.
Input element
This is the most popular element of the HTML form. Used to create text fields in which the user enters information (for example: password, mail address, etc.).
Create a text field in which the user can enter his name.
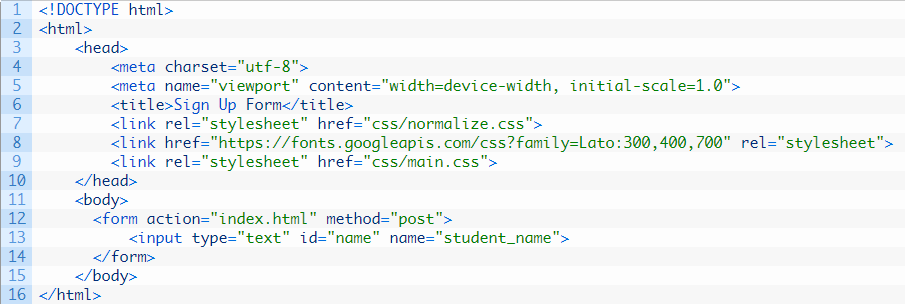
In the example above, three attributes were added above the input tag.
type
Indicates an input type. If the value is text, the user must enter text data. This attribute has many values, for example, email, tel (for a phone number), password, etc.
Example: when you try to log into your profile on the site (Amazon / Netflix), you must specify your mail and password. For these purposes, the input element is used. The type attributes will have email and password values respectively.
id
This is not a required but very useful HTML form field. For example, for defining elements in CSS / JavaScript. Identifiers are used to match labels with the necessary form controls.
name
Required attribute. When submitting an HTML form to the server code, the server must interpret the data from the form and process it correctly.
placeholder
The attribute tells the user what to enter in the HTML form input field. Disappears as soon as the user starts typing in the field.
Note: Using different values in the type attribute displays different results:

Input elements without placeholder:

Input elements with placeholder:

Textarea element
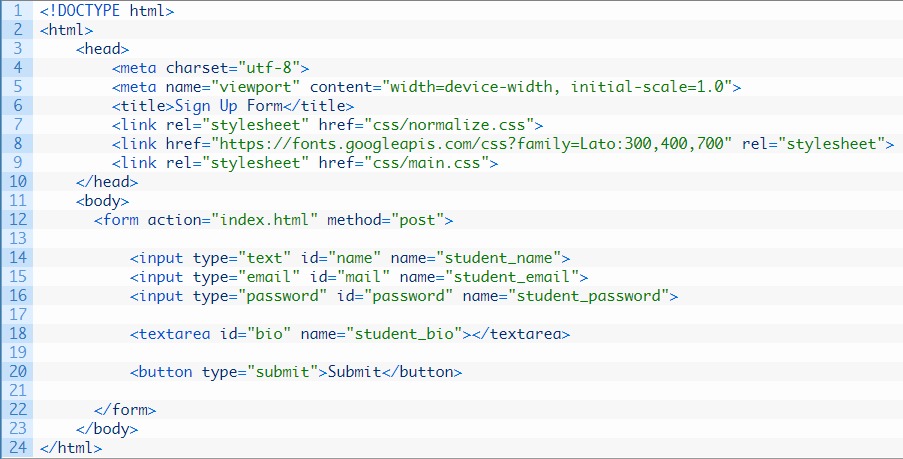
Sometimes a single line of text is not enough, and the simple input element is completely inappropriate. For example, on some sites, forms are added in which users leave their reviews and ask questions. In such cases, it is better to resort to the textarea element.
The <textarea> element is not a self-closing tag, and therefore requires an opening and closing parenthesis.
Attributes:
- id - see <input />.
- name - see <input />.
- cols - sets the visible width of the text area.
- rows - sets the visible number of rows in the text area.


Note: In most browsers, you can resize an item.
Button element
One of the most important elements of an HTML form. Without a button you cannot send and process form data on the server.
The element sets the type attribute, which can take three different values: submit, reset, and button.
Attributes:
- type = ”reset” - when clicked, clears all form data.
- type = "button" - there is no standard behavior in it. Mainly used in JavaScript for programming custom behavior.
- type = "submit" - the standard behavior of the "Send" button, i.e. data transfer to the server.

Label element
So far, the user will not be able to understand why each element of the HTML form is needed. You cannot predict where to enter the email address, and where to enter the password. Forms look unfinished and incomprehensible.
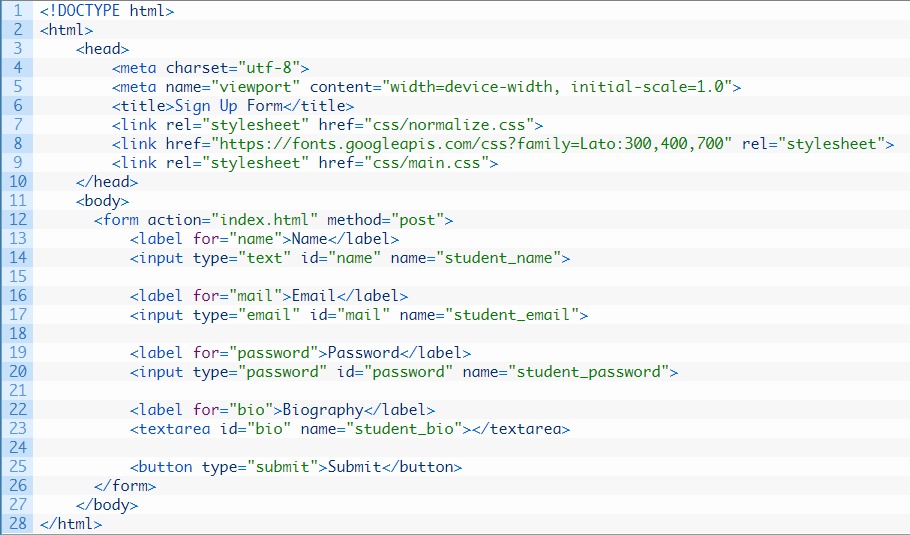
Each line of the HTML form can be labeled with a label element.
The most popular label attribute is for.
Attributes:
for - binds a string label to a specific form element. Compliance is checked by ID. The value of the ID attribute for the input element in the example above is email. It matches the value of the for attribute for the label element. Thus, both elements are related.

Note: if you hover the mouse over the label (string name), the input field associated with this label is activated. This is the standard behavior of the element.
Menu select
Sometimes it is necessary to create an HTML form in which the user will select certain values.
To save space in the interface, it is recommended to make all lists longer than 4-5 items in the select menu.
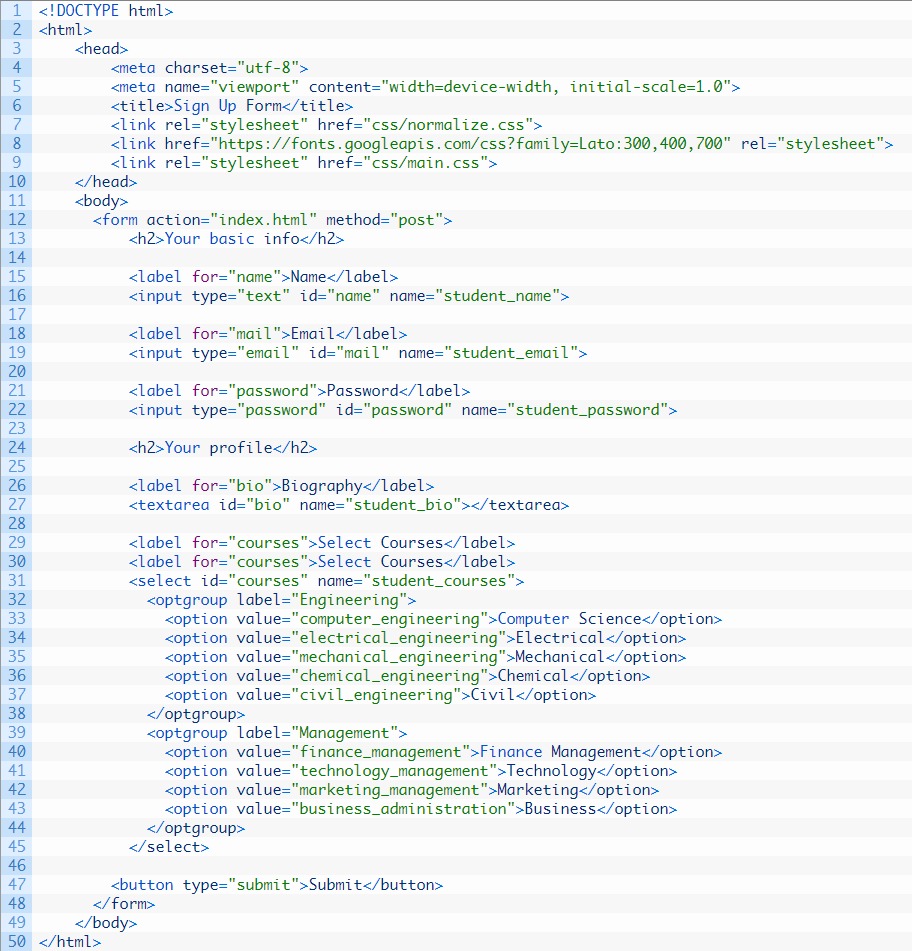
Example: a university entry form in which students select the desired training profile.
The <select> element needs opening and closing tags.
<select> displays a drop-down menu with the specified values. The select element itself does not perform any actions, since he needs additional tags (option elements). Here you can draw a parallel with the <ul> tag, which requires <li> elements.
Attributes:
- name - see <input />.
- <option> is a choice from the select menu. Uses attribute value.
value - when sending a form to the server, each element has a specific value for text fields and areas. In other words, value is all that the user indicates in the field. But when creating a select menu with ready-made options, it is necessary to define in advance the value in them.


For the course selection form, the label element is also set. In addition, the lists can be ordered by logical groups. For this purpose, the <optgroup> element is used.
Attributes:
label: - the name of the group of options (options). In the example below, the choices are divided into two groups labeled Engineering (Engineering) and Management (Management).
Radio buttons
The select menu is the perfect solution for an HTML form with a voluminous list. However, if there are 5 or less choices, it is better to implement them through radio buttons.
Unlike the select menu, radio buttons (radio button) immediately show all available options. The user can still choose only one option.
Attributes:
- name - see <input />.
- value - the definition of the values of the specified options.
Note: If you select one option and try to select another, the first selection will be deleted. This is realized thanks to the name attribute, in which these two radio buttons belong to the same group.

Note: Within one group of radio buttons, the name attribute must be the same.
Checkboxes
Sometimes it is necessary to create a certain group of different options from which the user can select several. With this help checkboxes.
Attributes:
- name - see <input />.
- value - the definition of the values of the specified options.
- checked - mark on the selection of this option, because By default, checkboxes do not have a selected value. It is important to remember that this is a boolean.
Note: Within one group of radio buttons, the name attribute must be the same.
<input type = "checkbox" checked id = "name" value = "abhishek" name = "user_name" />
In the example below, each individual variant was used with labels (the label element). To combine checkboxes and labels inside an HTML form, the for attribute for the label and the id attribute for the checkbox were used.
Note: since it is inconvenient to click on small checkboxes, it is better to wrap the <label> element around each checkbox. Then, when you click in the label area, the checkbox selection will be added or removed. However, in the example below, this is not done.


Differences between checkboxes and HTML form radio buttons
A checkbox can exist by itself. Radiknupku appear only as a group (at least 2 buttons).
In contrast to the radio button, the checkbox selection is not mandatory.
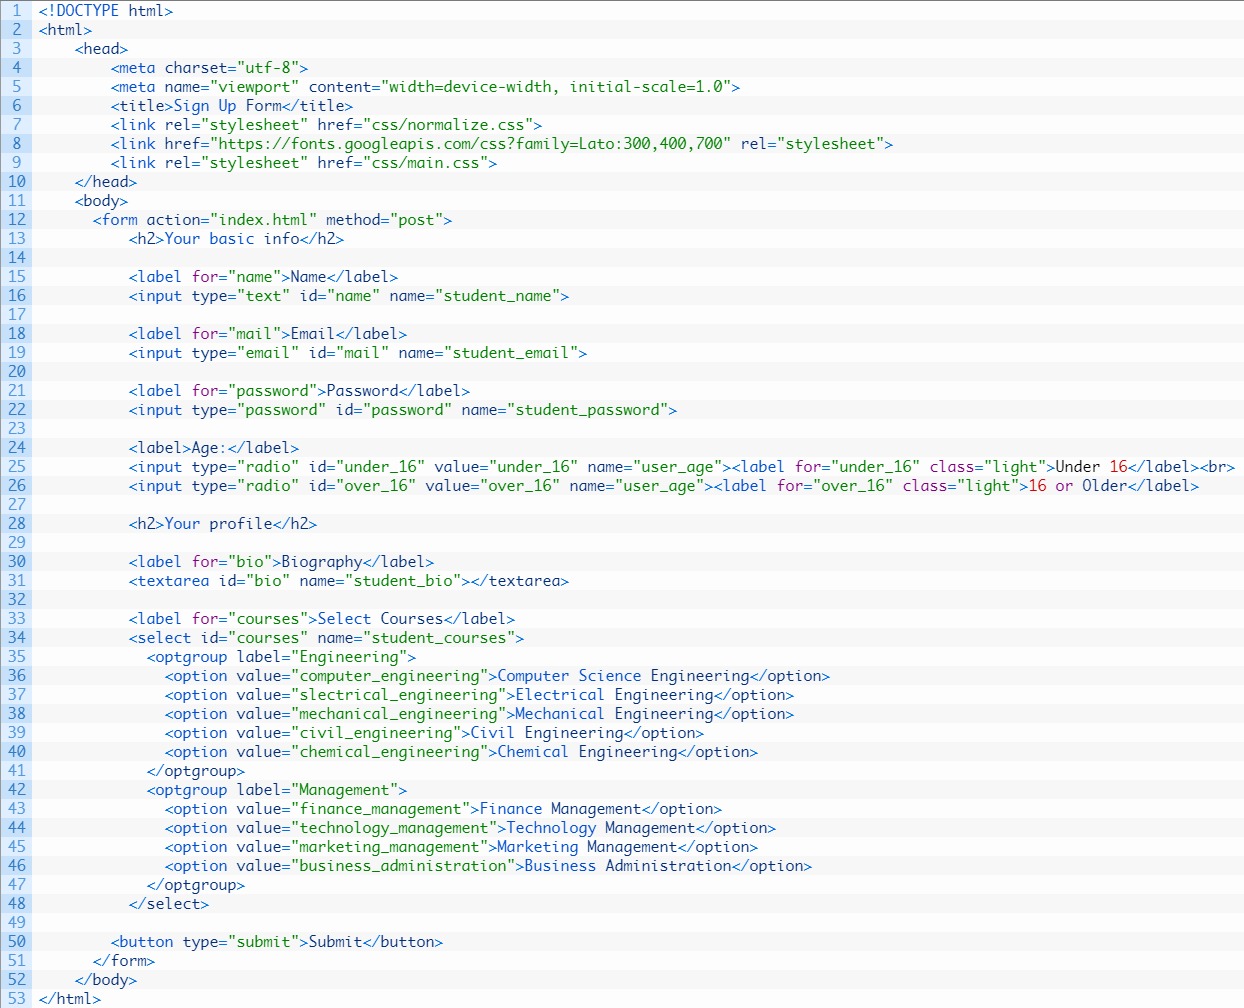
Final result

The article presented a step-by-step guide to creating an HTML form. Do not try to remember everything at once - no developer can name each attribute or element. It is much more important to learn to navigate the documentation.
You can add CSS to these examples and create your own forms.
Translation of the article by Abhishek Jakhar: A step-by-step guide to getting started with HTML forms