Audience
Push.HouseAudience section.
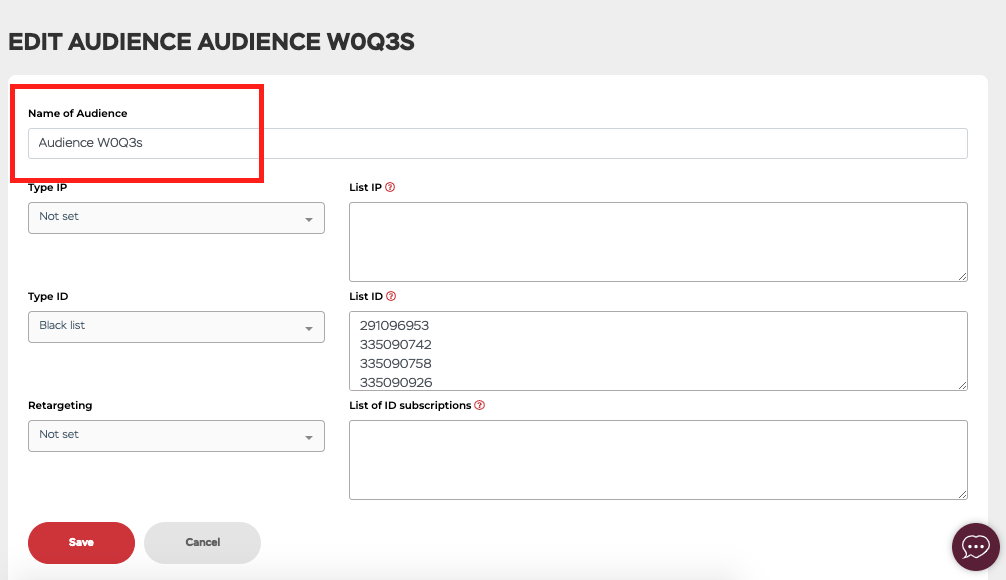
Creating a Black / White List (Type ID)
If you want to run your campaign on certain sites, you need to create a Whitelist of sites that you selected after analyzing the statistics. This is done as follows:
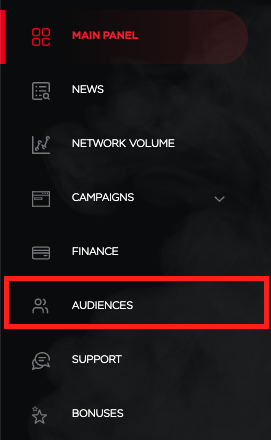
Go to the menu, section “Audiences”.
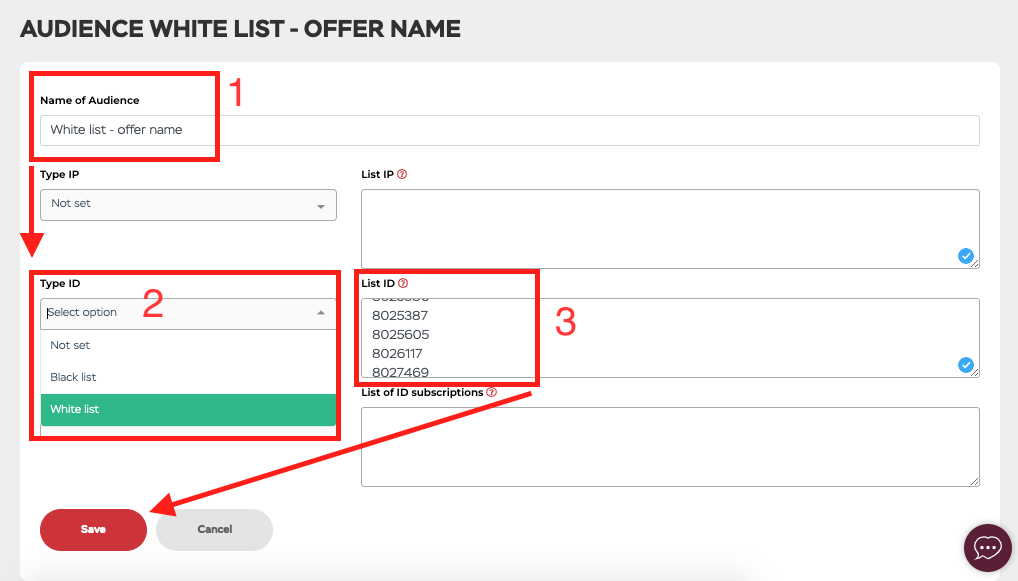
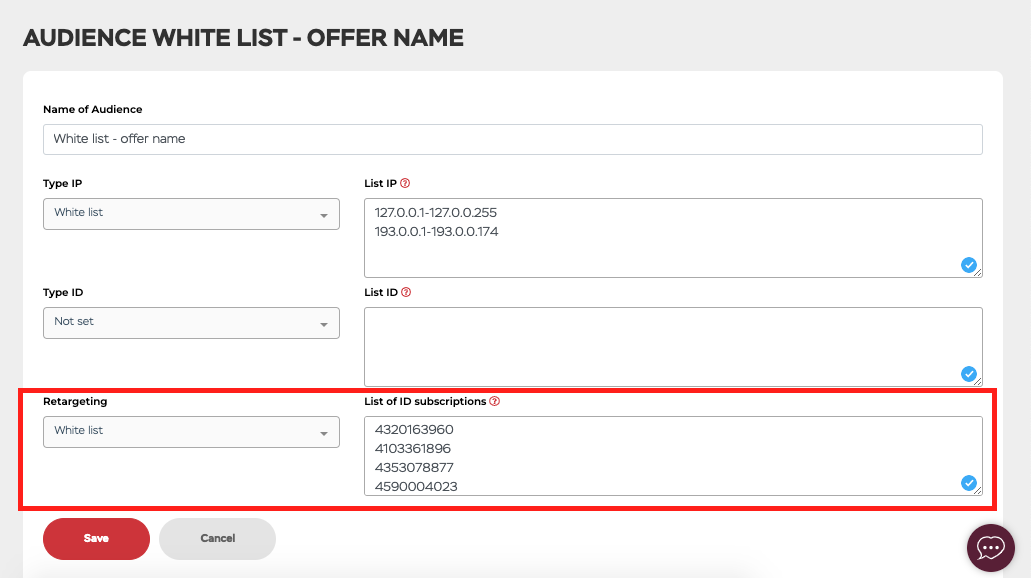
To create a White List, you must specify:
1. The name of the audience you are creating. (For example: White list - offer name)
2. ID type (In the drop-down list, select WHITE LIST).
3. Enter a list of site IDs, one per line.
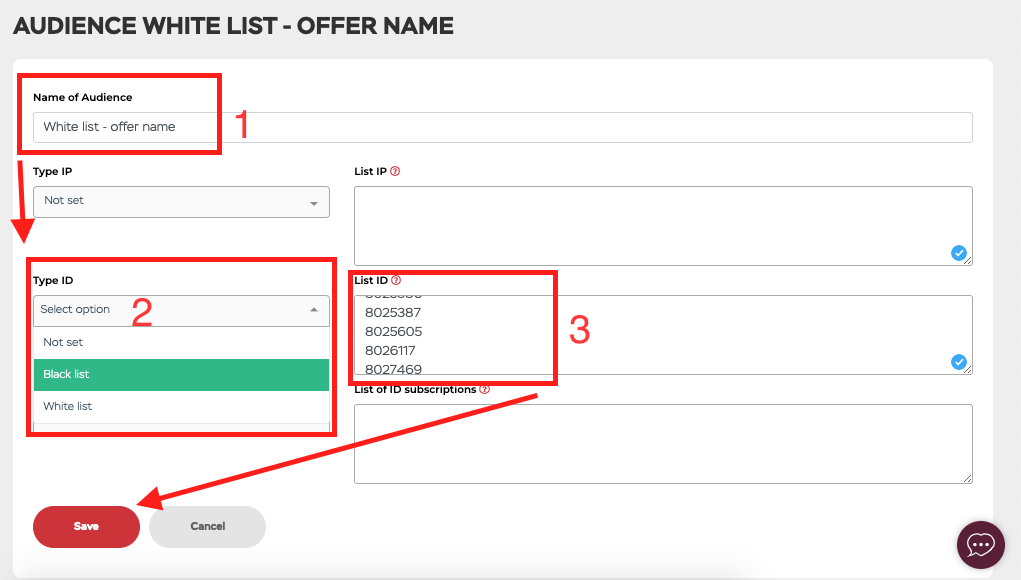
If, on the other hand, you want to exclude some sites from rotation, you need to create a Black List.
To create a Black list, specify:
1. The name of the audience you are creating. (For example: Black list - offer name).
2. ID type (In the drop-down list, select BLACK LIST).
3. Enter a list of site IDs, one per line.
IP Blacklist / Whitelist (IP Type)
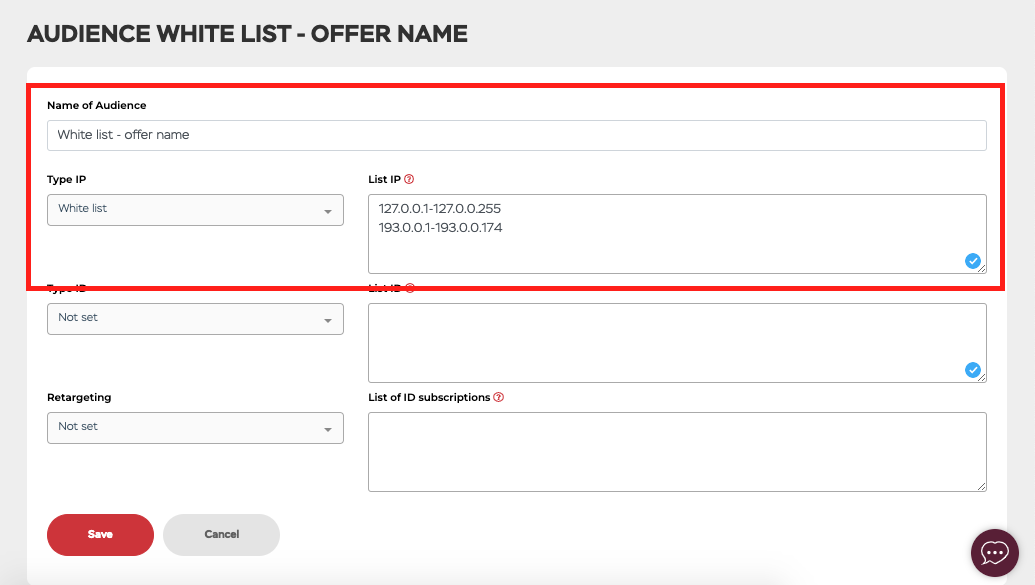
The white list is used if you need traffic from specific ranges of an operator or geo-region. So, you can specify the ip-ranges of operators that are accepted by your Affiliate Program or set up the purchase of traffic from ranges that belong to a specific city that is not allocated in our network.
The black list is used when, on the contrary, it is necessary to prohibit the display of advertising on part of the operator's ip-ranges or to exclude a specific city that is not allocated separately on the network.
Ranges are specified as: Ranges from 1.1.1.1-2.2.2.2, each on a new line, both in the blacklist and in the whitelist.
Retargeting
If you need to target a specific audience, for example, those subscriptions which performed a certain action (conversion), specify the subscription IDs, they are transferred to the statistics using the {pdpid} macro.
Each ID is on a new line.
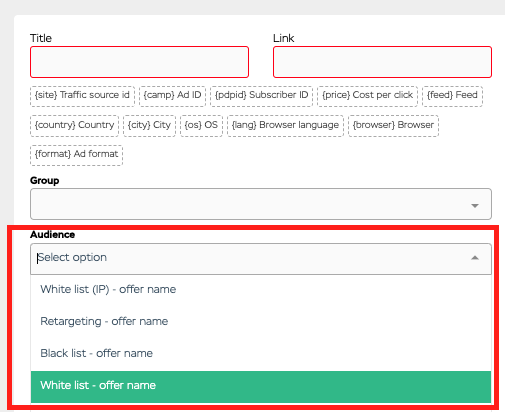
Adding an audience to a campaign
After creating and saving all the necessary audiences, they will be displayed in the AUDIENCES section when creating or editing a campaign. There you can select the exact audience you want to target.
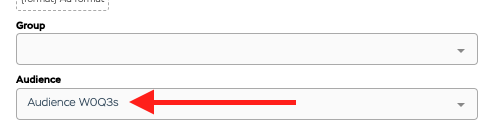
How to understand which audience belongs to which campaign?
If you see an unfamiliar to you audience name in the “Audiences” section, do not be afraid. To determine which audience belongs to which campaign, you need to go to page editing, refresh the page, the audience will automatically be pulled up to the campaign and its name will be displayed.
Then, in the “Audiences” section, you need to find exactly this name, you can use the search tool of your browser if you have a large number of audiences.
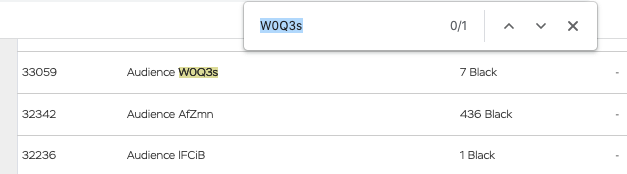
Having determined the audience you need, you can click on the edit icon and edit the audience.
Main features:
- The same audience can be assigned to several campaigns, which greatly simplifies the creation of Black / White lists.
- Single-line list maintenance will not take as much time as comma-separated lists.
- Now you can combine audiences for different campaigns, but with just 1 click, rather than transferring entire lists.
- The ability to combine audiences + retargeting.