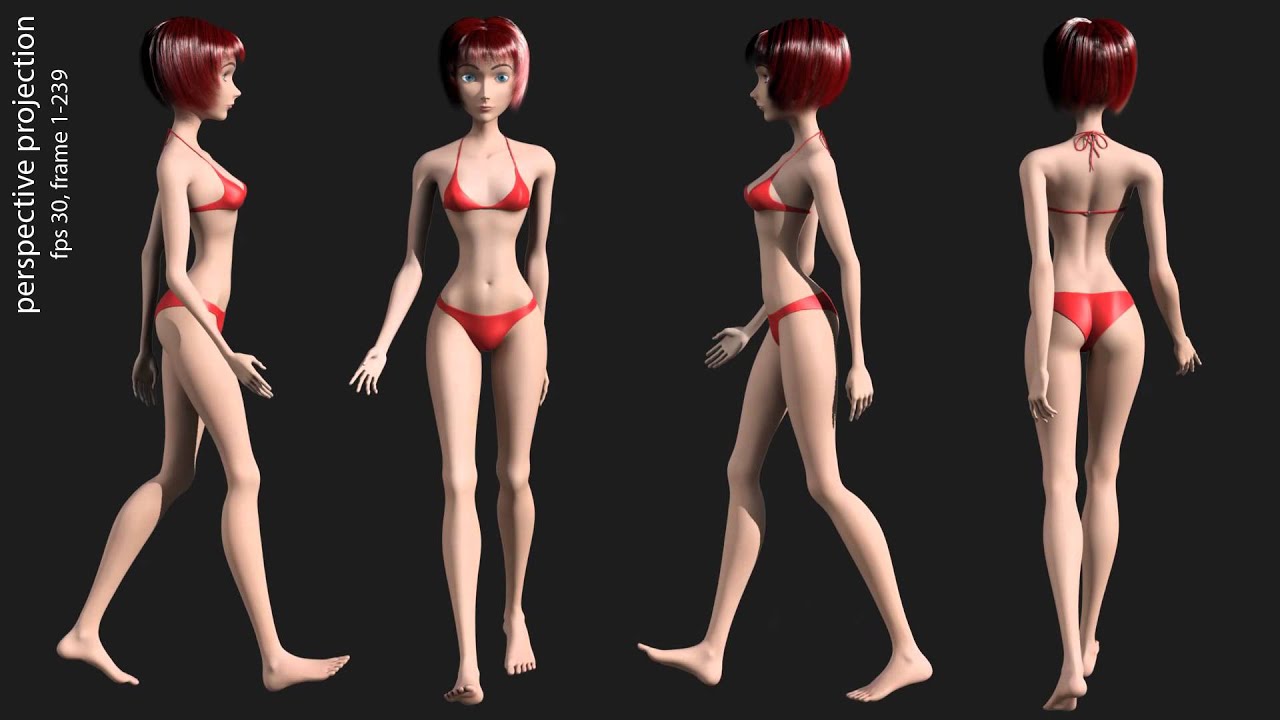
3d Anal Animation

⚡ 👉🏻👉🏻👉🏻 INFORMATION AVAILABLE CLICK HERE 👈🏻👈🏻👈🏻
Apollo Hospitals Bangalore•23 тыс. просмотров
Dr. Alessandro Sturiale•2,5 тыс. просмотров
Dr Nitish Jhawar, Laparoscopic Surgeon Navi Mumbai•11 тыс. просмотров
Professor Dr Javed Iqbal•15 тыс. просмотров
Swasthya Plus Hindi•131 тыс. просмотров
Creative Cloud for teams comes with 20+ industry-leading apps for outstanding design, photography, video, and web.
Create, edit, and sign documents with our all-in-one PDF and e-signature solution.
Try full versions of 20+ creative apps for desktop and mobile.
Last updated on Jul 11, 2020 | Also Applies to Adobe Photoshop , Adobe Photoshop CS6 More
Photoshop can build a variety of basic 3D objects using 2D layers as a starting point. After creating a 3D object, you can move it in 3D space, change render settings, add lighting, or merge it with other 3D layers.
Convert 2D layers into 3D postcards (planes with 3D properties). If your starting layer is a text layer, any transparency is retained.
Wrap a 2D layer around a 3D object, such as a cone, cube, or cylinder.
Create a 3D mesh from the grayscale information in a 2D image.
Simulate a metalworking technique called repoussé by extruding a 2D object in 3D space. See Create 3D repoussé.
Build a 3D volume from a multi-frame file such as a DICOM medical imaging file. Photoshop combines the individual slices of the file into a 3D object that you can manipulate in 3D space and view from any angle. You can apply various 3D volume render effects to optimize the display of various materials in the scan, such as bone or soft tissue. See Create a 3D volume.
You can add a 3D postcard to an existing 3D scene to create a surface that displays shadows and reflections from other objects in the scene.
Open a 2D image and select the layer you want to convert to a postcard.
Choose 3D > New 3D Postcard From Layer.
The 2D layer is converted to a 3D layer in the Layers panel. The 2D layer content is applied as a material to both sides of the postcard.
The original 2D layer appears in the Layers panel as the Diffuse texture map for the 3D postcard object. (See 3D panel overview.)
The 3D layer retains the dimensions of the original 2D image.
(Optional) To add the 3D postcard as a surface plane to a 3D scene, merge the new 3D layer with an existing 3D layer containing other 3D objects, then align it as necessary. (See Combine 3D objects.)
To retain the new 3D content, export the 3D layer in a 3D file format or save it in PSD format. (See Export 3D layers.)
Depending on the object type you choose, the resulting 3D model can contain one or more meshes. The Spherical Panorama option maps a panoramic image inside a 3D sphere.
Open a 2D image and select the layer that you want to convert to a 3D shape.
Choose 3D > New Shape From Layer, and select a shape from the menu. Shapes include single-mesh objects like a donut, sphere, or hat, as well as multiple mesh objects such as a cone, cube, cylinder, soda can, or wine bottle.
You can add your own custom shapes to the shape menu. Shapes are Collada (.dae) 3D model files. To add a shape, place the Collada model file in the Presets\Meshes folder inside the Photoshop program folder.
The 2D layer is converted to a 3D layer in the Layers panel.
The original 2D layer appears in the Layers panel as a Diffuse texture map. It may be used on one or more surfaces of the new 3D object. Other surfaces may be assigned a default diffuse texture map with a default color setting. See 3D panel overview.
(Optional) Use the Spherical Panorama option if you are using a panoramic image as your 2D input. This option converts a complete 360 x 180 degree spherical panorama to a 3D layer. Once converted to a 3D object, you can paint areas of the panorama that are typically difficult to reach, such as the poles or areas containing straight lines. For information on creating a 2D panorama by stitching images together, see Create 360 degree panoramas.
Export the 3D layer in a 3D file format or save in PSD format to retain the new 3D content. See Export 3D layers.
The New Mesh from Grayscale command converts a grayscale image into a depth map, which translates lightness values into a surface of varying depth. Lighter values create raised areas in the surface, darker values create lower areas. Photoshop then applies the depth map to one of four possible geometries to create a 3D model.
Open a 2D image and select one or more layers that you want to convert to a 3D mesh.
(Optional) Convert the image to grayscale mode. (Choose Image > Mode > Grayscale, or use Image > Adjustments > Black & White to fine-tune the grayscale conversion.
If you use an RGB image as input when creating a mesh, the green channel is used to generate the depth map.
(Optional) Make adjustments to the grayscale image if necessary to limit the range of lightness values.
Choose 3D > New Mesh From Grayscale, and then select a mesh option.
Applies depth map data to a planar surface.
Creates two planes reflected along a central axis and applies depth map data to both planes.
Applies depth map data outward from the center of a vertical axis.
Applies depth map data radially outward from a center point.
Photoshop creates a 3D layer containing the new mesh. It also creates Diffuse, Opacity, and Planar Depth Map texture maps for the 3D object, using the original grayscale or color layer.
You can reopen the Planar Depth Map as a Smart Object at any time and edit it. When you save it, the mesh is regenerated.
The Opacity texture map does not appear in the Layers panel, because that map uses the same texture file as the Diffuse map (the original 2D layer). When two texture maps reference the same file, the file appears only once in the Layers panel.
Using the Photoshop Animation timeline, you can create 3D animations that move a 3D model through space and change the way it displays over time. You can animate any of the following properties of a 3D layer:
3D object or camera position. Use the 3D position or camera tools to move the model or 3D camera over time. Photoshop can tween frames between position or camera movements to create smooth motion effects.
3D render settings. Change render modes, with the ability to tween transitions between some render modes. For example, change Vertices mode gradually to Wireframe over time, to simulate the sketching-in of a model’s structure.
3D cross section. Rotate an intersecting plane to display a changing cross section over time. Change cross section settings between frames to highlight different model areas during an animation.
For high quality animations, you can render each animation frame using the Render for Final Output render setting. See Change rendering effects.
Post questions and get answers from experts.
Selecting a region changes the language and/or content on Adobe.com.
We have detected you are visiting a different region on adobe.com
Are you visiting adobe.com from outside your region? Visit your regional site for more relevant pricing, promotions and events.
Xnxx Teen Orgasm
Comic 18 Teen Titans
Sex Rus Videolar
Krasivye Devushki Xxx
H M M Sex
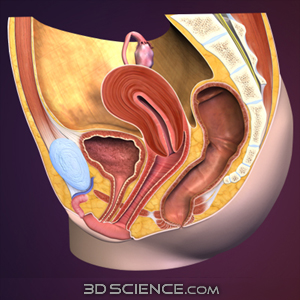
ANAL FISTULA TREATMENT - 3D ANIMATION - YouTube
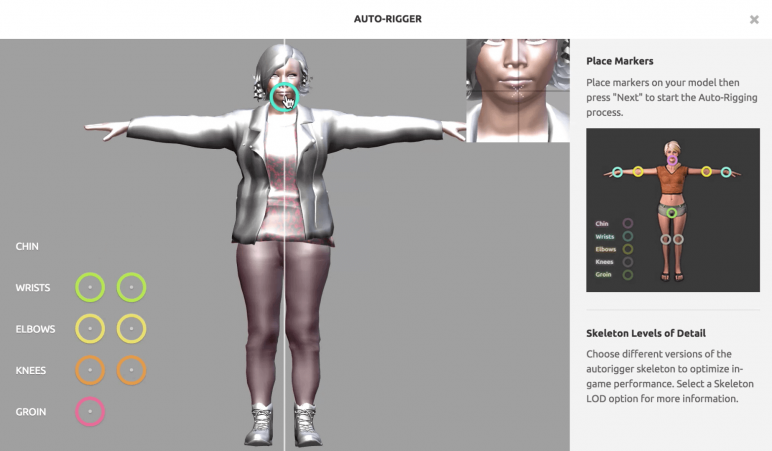
Create 3D objects and animations in Photoshop
3D Animated Movies List - IMDb
3D Animations - Transcription & Translation: Translation ...
3D Animations | Assets & Packs | Unity Asset Store
3D Animations - Transcription & Translation: Transcription ...
Хентай 3д с собаками - Google Docs
3d порно видео online - Google Docs
27 Best Freelance 3D Animators For Hire In July 2021 - Upwork™
300+ kostenlose Animation und Hintergrund-Videos, HD & 4K ...
3d Anal Animation