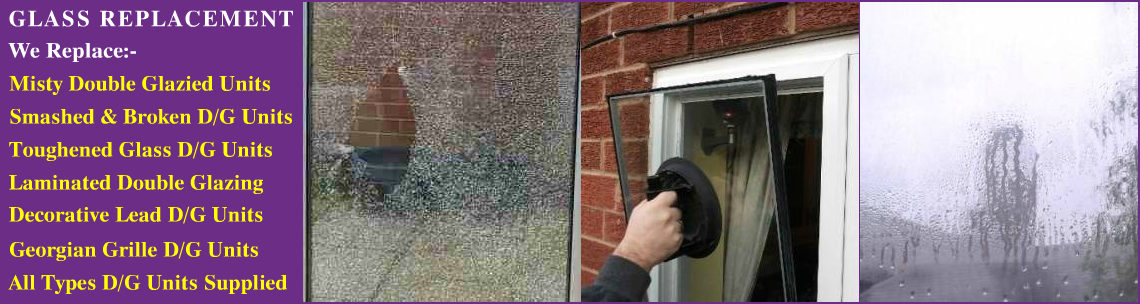
10 Tips For Getting The Most Value From French Door Seal Replacement
French Door Seal Replacement
The replacement of French door seals helps to regulate the air inside your home and reduces the cost of energy. This simple DIY project can be completed in one hour.
Tubular and V-strip seals are effective air barriers, often installed in milled grooves at the base of a door sash; or between a frame and door. The seals self-stick, and installation is quicker.
Selecting the Right Weatherstrip Seal
Over time, the natural wear and tear, and everyday use can cause the seals around your doors to break down. This causes air from outside to escape and lead to higher cooling and heating costs and a decrease in indoor comfort. Weather stripping is a way to prevent snow, rain and outside noise from entering the home and prevents costly leakage of heated or cooled indoor air.
There are a variety of weather stripping that are available. Certain kinds of weather stripping are more durable while others are more straightforward to install. The type of weatherstripping you choose will depend on your particular requirements.
Felt weatherstrip is the most commonly used and cheapest alternative. It is typically fixed or nailed to the jamb, and when the door is closed it expands the material, forming the appearance of a seal. Felt is best used in dry weather since it cannot stand up to moisture.
Foam tape is made from closed or open-cell foam and has an adhesive back. It is available in a variety of thicknesses and widths which makes it ideal to fill small gaps. It can be cut to the size required and placed on the top of a door or in the corners of window frames.
The weatherstrip made of rubber is an option that is more durable and is similar to foam tape. It is easily installed and can be attached to the frame or door jamb with adhesive. It is available in a variety of widths and can be cut to fit larger gaps.
Door sweeps are flat pieces of aluminum, plastic or steel that have the appearance of a seal made by a brush. They can be used to stop drafts and accumulation of snow at the bottom of the door or at its hinge.
The push-on seals (also called "C-clip seals") are designed to be pushed onto the lip. They have a metal core which is completely covered with rubber to prevent corrosion. They are designed to prevent drafts, prevent leaks and allow for easier opening and close doors.
The unique vehicle make, model and year are generally used to determine the vehicle's weatherstripping. This can be both useful but also frustrating, as you might be unable to locate the exact weatherstripping for your car because it's often sold out.
Removing the old Weatherstrip
A damaged or missing weatherstrip could lead to air infiltration, energy losses and pest infestations. Sealants or patches can be used to repair minor tears and damage however a more thorough repair is typically required for more severe damage. Door weatherstrips are an essential home maintenance item, and replacing it can enhance the comfort as well as the energy efficiency of your home.
If your current weatherstrip is composed of vinyl, rubber or metal, it's crucial to remove the old weatherstrip carefully before you start the process of installing it. This will ensure that the new weatherstrip is adhered to the door frame in a proper manner and does not leave gaps that could allow moisture or drafts to get in.
Start by taking off the screws or nails that hold the old weatherstrip in place and then remove it from either side of the doorframe. Clean the area thoroughly, ensuring that there is nothing behind that could interfere with the adhesion of the new seal to the door frame. It is also important to consider the best method to dispose of the old weatherstrip seal, because some areas have specific rules regarding the disposal of the seal.
Once the surface of the old weatherstrip is clean, you'll be ready to measure the new material. Be sure to take accurate measurements; even just a few inches could cause an insufficient weatherstrip seal. Use a tape measure to obtain your measurements, and keep in mind the phrase "measure twice cut once".
Close your windows and doors to ensure there aren't any gaps before you buy any new weatherstrip. It is also important to ensure that the hinges are tightened, as a misaligned door can result in gaps between the weatherstrip and the door frame.
It's time to buy and prepare the materials. Find the weatherstrip that will match the door frame you have, and then follow the manufacturer's directions to determine how best to cut it. Some vinyl and rubber weatherstrips can be cut with shears or utility knives while metal varieties should be cut using Tinsnips.
Cutting the New Weatherstrip
A properly functioning door weatherstrip seal is a great way to regulate indoor temperatures and minimize drafts, improving comfort and energy efficiency. This crucial home improvement may get damaged or worn out over time when used for a long period of time. Regular inspections and maintenance is recommended to keep your doors in good condition.
If you're replacing worn out weather stripping or adding it to a door frame that is not insulated choosing the right one is key. There are a variety of weatherstripping available on the market, each having its own advantages and disadvantages. Foam tape, for example is a well-known option that is easy to cut and install. This material is made from closed-cell or open-cell foam, or EPDM rubber with a sticky back and comes in a variety of widths making it a good choice for irregularly-sized gaps. Foam seals are also suitable for the top and bottom of window sashes and are easily cut to the dimensions of.
Pile weatherstripping on the other hand, uses an acrylic polypyrene base that has thin brush hair. It is designed to slide into a narrow channel in the hinge stile of your lock and stile of your door. Installers typically employ a screwdriver or hammer to secure this type of weatherstripping. Over time, the stakes may become loose or fall out, allowing the weather stripping under your door to slide.
To avoid this from happening, when you purchase a new weatherstrip for your pile, make certain to select the appropriate base width and also consider using adhesive-backed options. This will avoid having to stake your new weatherstrip down, and ensure that it is securely fixed.
Before you begin, make sure that the area around your french doors is free of any debris or residues left by old weather stripping. This will ensure that your new seal has an excellent bond to the door's frame and will create a solid barrier against drafts. Take replacement french doors repairmywindowsanddoors of the groove that the old weatherstrip occupied. This will ensure that the new seal is installed properly.
Installing the Weatherstrip
A properly functioning door weather strip seal is an airtight barrier against outside air and moisture. This shields your walls, doors, frames, and other elements from damage. It also helps reduce energy consumption and cost by preventing drafts. It's a relatively easy DIY project to replace a worn-out or damaged weather strip. The effort is worthwhile if you wish to minimize energy loss and improve your indoor comfort.
Clean the area you intend to put up your new weatherstrip. Make use of a brush or a towel to get rid of any dirt, dust, or residue on the frame that could compromise the bond between the adhesive and the new weather stripping.
After the area is cleaned and dry, you can decide what type of weather stripping you'll need. There are a variety of options, ranging from inexpensive self-adhesive tapes, to highly effective rubber gaskets. Some are inserted into grooves milled at the base of windows or doors, while others like tubular Vinyl reinforced with silicone come attached to wooden or metal strips that can be screwed or nailed in the right spot.
Choose a type that best suits your requirements and installation requirements taking into consideration durability, longevity, and ease of application. Adhesive-backed weather stripping is easy to apply, but some types, like interlocking weather stripping made of metal will require a bit more knowledge and expertise.
After you have selected the type of product, be sure to measure it and cut it at the correct length. Remember the old saying, "Measure once, cut twice." This will help ensure that your new weather stripping is correctly sized and will fit the groove properly.
Test your weatherstrip before installing it. Close the door and check for a tight seal. If it's difficult to close or if there are gaps, the weather stripping may be too thick or the measurements might have been off. If this is the situation you can either cut it down to the correct size or reapply the stripping to achieve a better fitting.
Once you've finished it's crucial to wait for 24 hours before closing the door or trunk lid. If you close them while the glue is wet, the weatherstrip may slip off the newly glued surface and allow water or other unwanted elements to get into your home.