SSH
Alpha Private
SSH (Secure Shell) is a network protocol that encrypts all data transmitted through it, including passwords, which provides the ability to transfer virtually any digital information over an encrypted channel. Your computer, exchanging keys, establishes a secure connection with the server, through which information is exchanged. Internet access is from the back of the SSH tunnel.
The list of advantages when using it is quite large:
• An encrypted channel established between your computer and the server does not allow you to determine what data is being transmitted over it. Thus, neither the provider nor any intruder can determine what information you are requesting or transmitting through the tunnel. This method ensures data security, for example, domestically (if the server is located abroad).
• All your requests will have the IP address of the server, i.e. An SSH tunnel works like a transparent, anonymous proxy. Thus, if the server to which you are connecting is in Germany or Canada, you will have the corresponding address and you can, for example, watch videos on YouTube that are not accessible to residents of your country.
• No blocking of individual sites by your provider will extend to you - through it, you connect only to the SSH server, and further surfing the network comes from the point where the server is connected to the Internet and the provider’s lockout does not affect it.
Where and how to connect to the SSH-server?
First, there are a number of free servers that provide Shell access, but I strongly advise against using free resources. In addition, a huge amount of resources provide paid service for a fairly reasonable price. Use the search query "SSH-server" and you will quickly find what you are looking for. And thirdly, if you already pay for hosting for your site with Shell support, you don’t need to worry about anything at all - you already have everything you need to access the network via SSH.
To secure the tunnel, you should use the Bitvise SSH Client software, which besides tunneling provides the ability to securely transfer files between your machine and the server, and also has a built-in terminal for Shell access to the server. In addition, an important advantage of this SSH client is a free license for individual use.

Configure Bitvise SSH Client
There are practically no difficulties in setting up this software. To begin with, on the “Login” tab, you must specify the server address (1) and port (2) for connection (check with the host or in the service that provides access to the SSH server), as well as your login credentials for Shell access — login ( 3) and password (4). Subsequently, you will be able to establish authentication using RSA-keys, but first, we will establish password authentication (password).

If desired, the password for the connection can be memorized in the profile, for which you should set the corresponding checkbox:

On the “Options” tab, set the “Automatically reconnect” option (1), as well as uncheck the box for opening the terminal windows and SFTP automatically after connecting (you can always open them manually):

To enable tunneling, on the “Services” tab, check the “Enabled” checkbox in the “Socks / HTTP Proxy Forwarding” section. For local use, neither the address nor the port need be changed, but it’s worth remembering them:
It is desirable to save the settings, for which there is a corresponding icon (1) on the left side of the screen. In the event that you have several servers to which you can connect, you can create the required number of profiles, saving data for accessing the necessary server in each of them, and then loading the required one using the upload icon (2).

The configured client connects to the server using the “Login” button at the bottom of the screen:

If you are not mistaken in entering your credentials, the server will report that the authentication was successful and establish a secure connection.

After the connection is established, the local Socks-proxy is automatically launched, connecting to which you will get access to the network through the SSH tunnel.
To connect, open the proxy settings in your browser or another program that uses a network connection, and specify the address of your SSH-Socks:
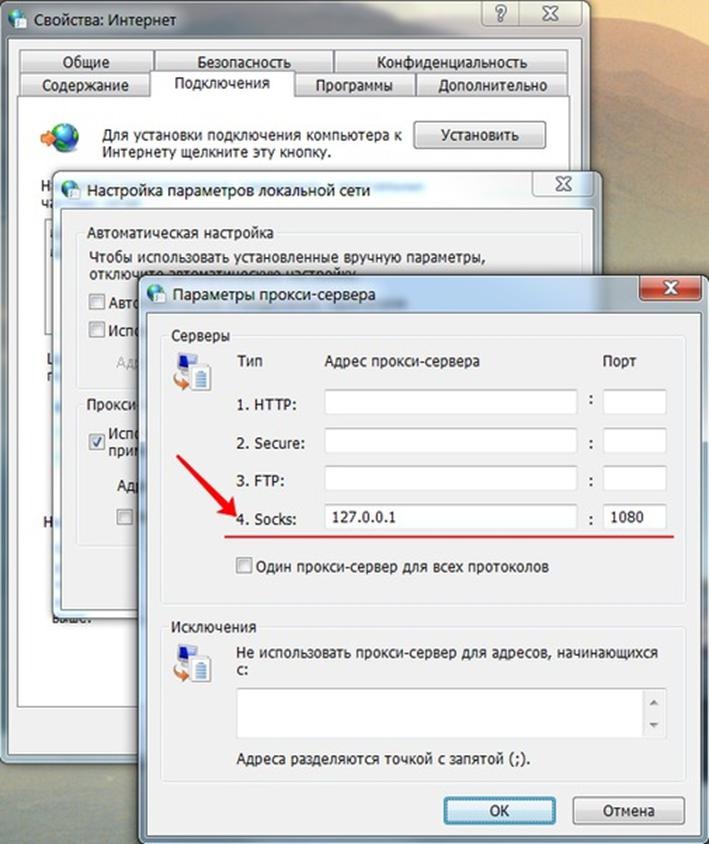
After saving the settings, the connections of your programs will be routed through the SSH tunnel, each connection is reflected in the Bitvise SSH Client window:

Now you are using an Internet connection using a server with which you have established a connection, therefore, problems with access to sites blocked in our segment of the Internet will no longer arise.
You can check what IP address as your “see” sites that you visit using the services 2ip.ru, myip.ru and many similar.
We draw the attention of those users who are going to use the SSH tunnel as hiding of their real IP-address, for the purposes of anonymity. Many browsers (Opera, Google Chrome, etc.) and other programs (for example, Skype), no matter what settings you use to connect to the network, try to establish direct service connections, bypassing the proxy. This, of course, instantly negates your anonymity, revealing the real IP address.
To eliminate this disclosure, it is necessary to prohibit outgoing connections for all programs, except the connection to your proxy address (127.0.0.1) and here we recall one of our favorite programs called Proxifier. And allow the Bitvise SSH Client program to have an outgoing connection with the address of the SSH server. In this case, anonymity will be respected immaculately.