Laravel
Fromis a free, open source PHP web application framework. It is built on top of several components, and makes common tasks such as authentication, routing, sessions and caching much easier to implement.
Before you start working with Laravel, make sure that either the (free) or (paid) plugins are . Both plugins additionally require installing the tool.
Additionally, make sure Composer is installed on your machine and initialized in the current project as described in .
Install with Composer. To do this, add a dependency for the barryvdh/laravel-ide-helper package to composer.json. Refer to for details.
-
Add Laravel IDE helper as a
ServiceProviderinto the application. In the config/app.php file, addBarryvdh\LaravelIdeHelper\IdeHelperServiceProvider::classunder theproviderselement:
return array( // ... 'providers' => array( // ... // Laravel IDE helper 'Barryvdh\LaravelIdeHelper\IdeHelperServiceProvider', ), // ...
);
The Laravel IDE Helper may have to be run after changing or adding services, controllers, models and views. Alternatively, set up in PhpStorm to automatically regenerate this file when, for example, composer.json is updated.
You can also install the to add various Laravel generators for models, views, controllers, and much more.
The Laravel plugin provides code completion and navigation for various Laravel components: controllers, routes, views, configuration, services, and translations. You can also use Laravel-specific live templates for generating various Laravel entities.
This section describes coding assistance provided by the plugin. For details on working with the Laravel Idea plugin, see the .
In the editor, press Ctrl+Space to invoke code completion and do any of the following:
-
Reference a controller when using the
RedirectandRoutefacade's various functions:
-
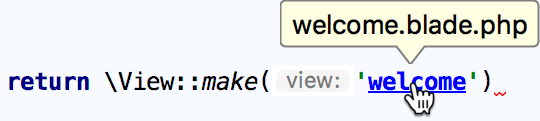
Reference a Blade template (or view) when using the
Viewfacade:
-
Reference various keys that are defined in our application's settings when using the
Configurationfacade: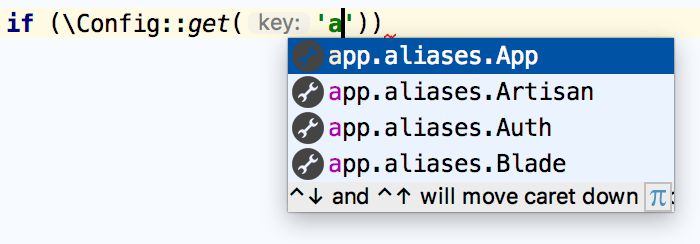
-
Complete various translation keys when using the
Langand callingLang::get():
To navigate to the declaration of an item, position the caret at its usage and press Ctrl+B. Alternatively, Ctrl+Click the usage.
-
Navigate to the controller's declaration:

-
Navigate to a Blade template (or view) declaration:
-
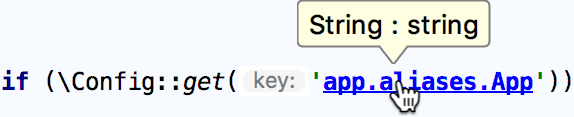
Navigate to the declaration of a configuration entry or a service:
-
Navigate to the declaration of a translation key:

PhpStorm provides numerous facilities. After downloading and installing the , you can extend the standard live templates set with Laravel-specific live templates, such as:
Blade directives
Input and Request snippets
Cookie snippets
Route snippets and generation
View, Response and Redirect templates
Building schema (includes column types)
Cache
Form and session snippets
Snippets calling various helpers
Before you start, make sure the Blade plugin is installed and enabled. The plugin is activated by default. If the plugin is disabled, enable it on the page as described in .
PhpStorm provides full support of the . It highlights various Blade syntax constructs, as well as any HTML, JavaScript and CSS code inside the templates.
Besides syntax highlighting, PhpStorm provides several other Blade-specific features.
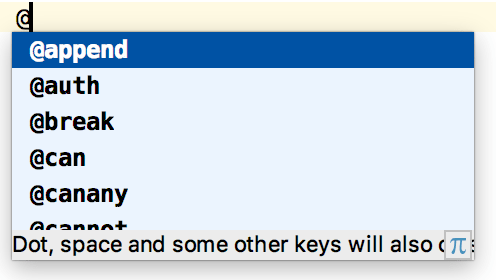
PhpStorm's editor provides code completion both for standard and custom Blade directives, which can be defined In the Settings/Preferences dialog Ctrl+Alt+S under .
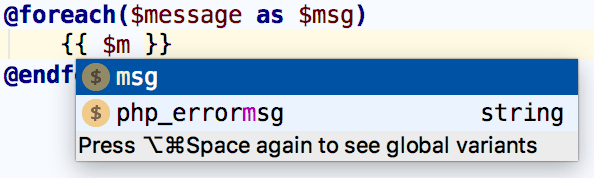
When @for or @foreach directives are used, variable introduction with code completion is available inside the construct's body.
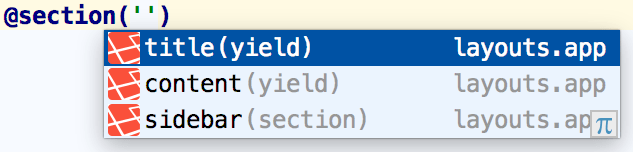
While working on a Blade template, you can open a section using the @section directive. PhpStorm provides code completion Ctrl+Space for all known sections' names in the project.
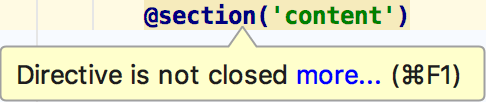
PhpStorm provides the code inspection that detects the sections that are not closed using the @stop directive.
To navigate to the declaration of a section, position the caret at its usage and press Ctrl+B. Alternatively, Ctrl+Click the usage.
The Laravel plugin also adds a marker to the editor gutter, which lets you navigate to the parent section.

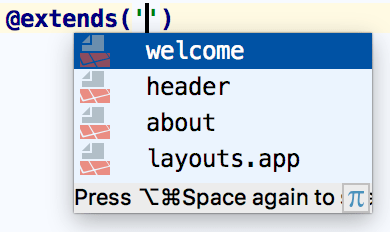
Blade templates are often composed of various includes of small reusable blocks, which are in turn other templates. You can also extend templates and provide content for additional sections. PhpStorm and the Laravel plugin provide completion for template names in both the @extends and the @include directives. Completion suggestions include template directory names as well as full template names.
To navigate to the declaration of a template, position the caret at its usage and press Ctrl+B. Alternatively, Ctrl+Click the usage.
Use Alt+F7 to quickly find all template usages in the project.
You can debug Blade templates using the same techniques as for regular PHP files.
Debugging Blade templates is supported for or later.
-
In the Settings/Preferences dialog Ctrl+Alt+S, go to and expand the Blade Debug area.
-
In the Cache path field, provide the path to the Blade folder. Type the path manually or click
 and select the relevant folder in the dialog that opens.
-
Start a debugging session as described in the . The easiest and recommended approach is to use :
With the debugging engine installed, you can start debugging your application by following the zero-configuration debugging approach:
Choose and install the suitable for your browser.
On the PhpStorm toolbar, toggle
 to start listening for incoming PHP debug connections, or choose from the main menu.
 -
Set a in your code.
Start the debugging session in the browser using the installed browser extension.
-
During a debugging session, : see variable values, evaluate expressions, step through the program, and so on.
See for the detailed step-by-step instructions, and for more debugging scenarios.
Blade directives are managed on the Directives tab of the . The tab lists all the currently available Blade directives, for those that have parameters, the prefixes and suffixes are also shown. When you start, the list contains only predefined directives. You can edit these directives as well as create custom ones.
-
In the Settings/Preferences dialog Ctrl+Alt+S, go to .
-
On the page that opens, switch to the Directives tab, which shows a list of all currently available directives.
-
To define a new directive, click
 and specify the directive's name in the Name field.
 If the new directives requires a prefix and a suffix, select the Has parameter checkbox and type the prefix and suffix to use in the Prefix and Suffix fields respectively. PhpStorm will automatically enclose the prefix and suffix in opening and closing brackets and quotes and add a colon separator
:so the parameters will look as follows: ("<prefix>:<suffix>"). -
To edit an existing directive, select it in the list and change the values in the fields below.
To restore the original definition, click
 .
. To remove a directive from the list, select it and click
 .
.
-
PhpStorm recognizes Blade templates and provides error highlighting and code completion for them based on the delimiters you specify.
-
In the Settings/Preferences dialog Ctrl+Alt+S, go to .
-
On the page that opens, switch to the Text Tags. The fields in the tab show the opening and closing characters for , , and .
The fields are filled in with the default values in compliance with . If you are using an earlier version, you can specify the relevant custom delimiters and PhpStorm will provide coding assistance according to the new rules.
-
In the Settings/Preferences dialog Ctrl+Alt+S, go to .
-
Click
on the toolbar. -
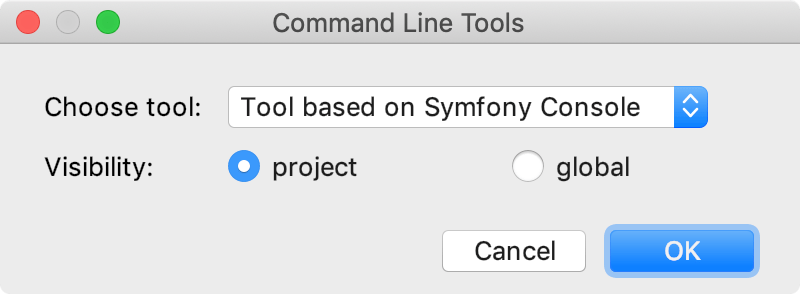
In the Command Line Tools dialog, choose Tool based on Symfony Console from the list, and specify its visibility level (Project or Global).
-
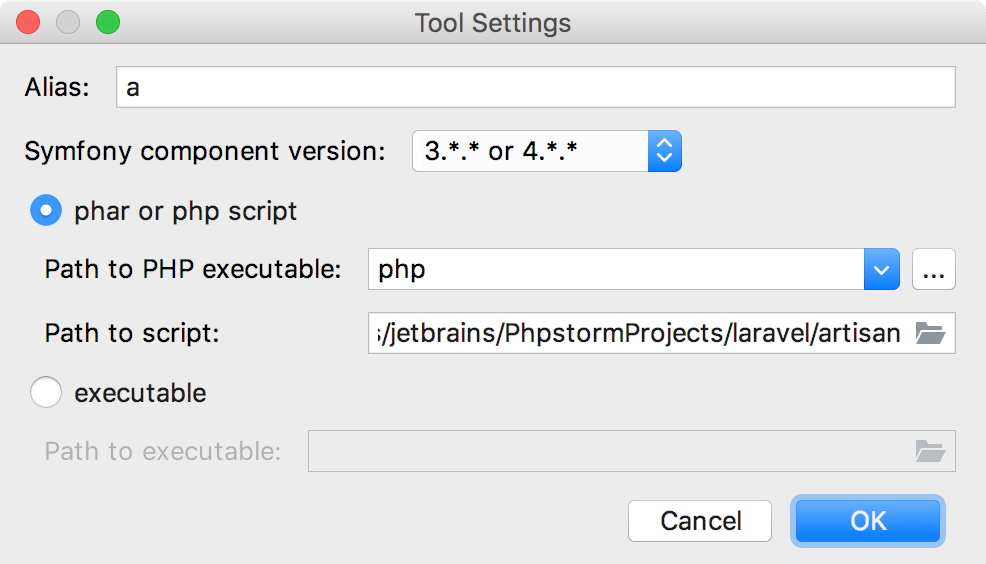
When you click OK, the tool settings dialog opens.
Specify the tool alias, provide the path to artisan and the PHP executable.
Click OK to apply changes and return to the Command Line Tool Support page. Optionally, click
 to edit the tool properties, or
  to customize the commands set. See for details.
You can now run the artisan ide-helper:generate command to generate the required PHPDoc information. PhpStorm and the Laravel plugin will use this information to provide code completion and navigation.
-
From the main menu, choose or press Ctrl twice.
In the Run Anything window that opens, type the call of the command in the
<a> <command>format.The command execution result is displayed in the .
Click
 on the toolbar.
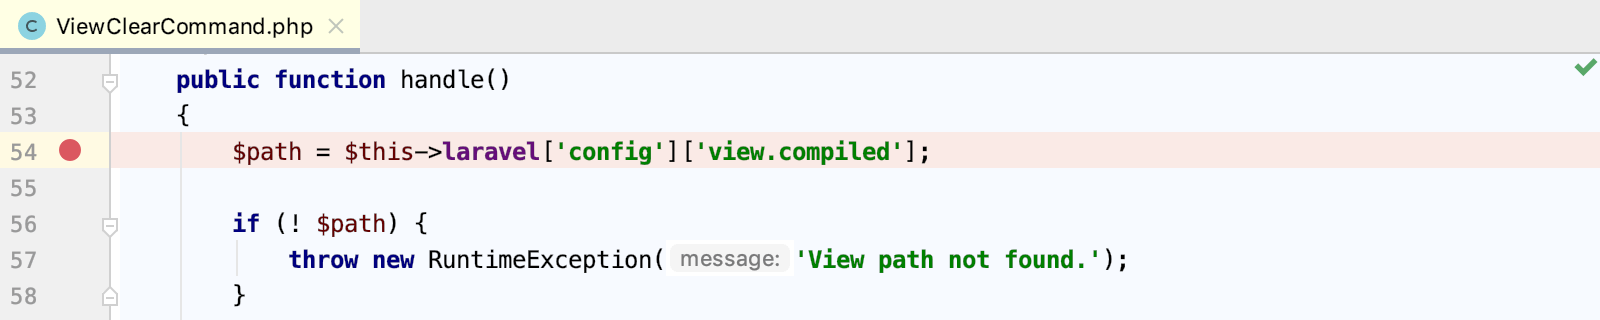
Laravel commands are defined in controller classes that extend Command. To debug a command, it is crucial that you initiate a debugging session for the command itself, and not the controller class file it is defined in. Otherwise, the Laravel bootstrapping process will be skipped, and the execution will fail.
-
In the controller class corresponding to the selected command, click the editor gutter at a code line where you want to set a .
-
Create a that will run the artisan tool with the selected command. In the main menu, select , then click
and choose PHP Script from the list. 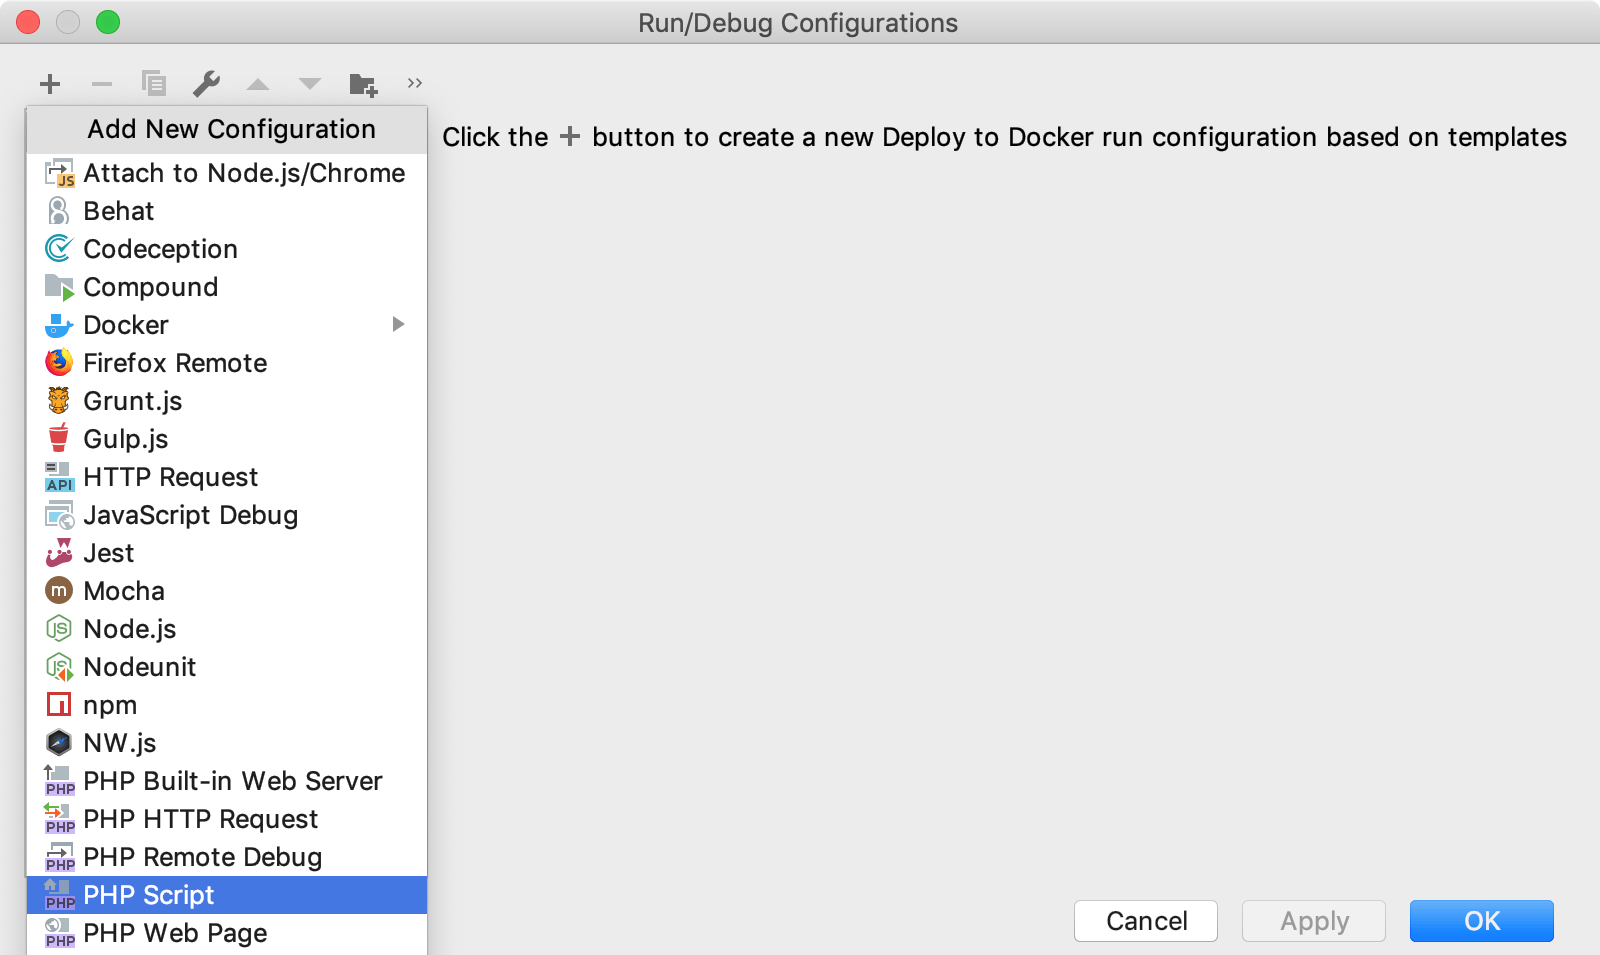
-
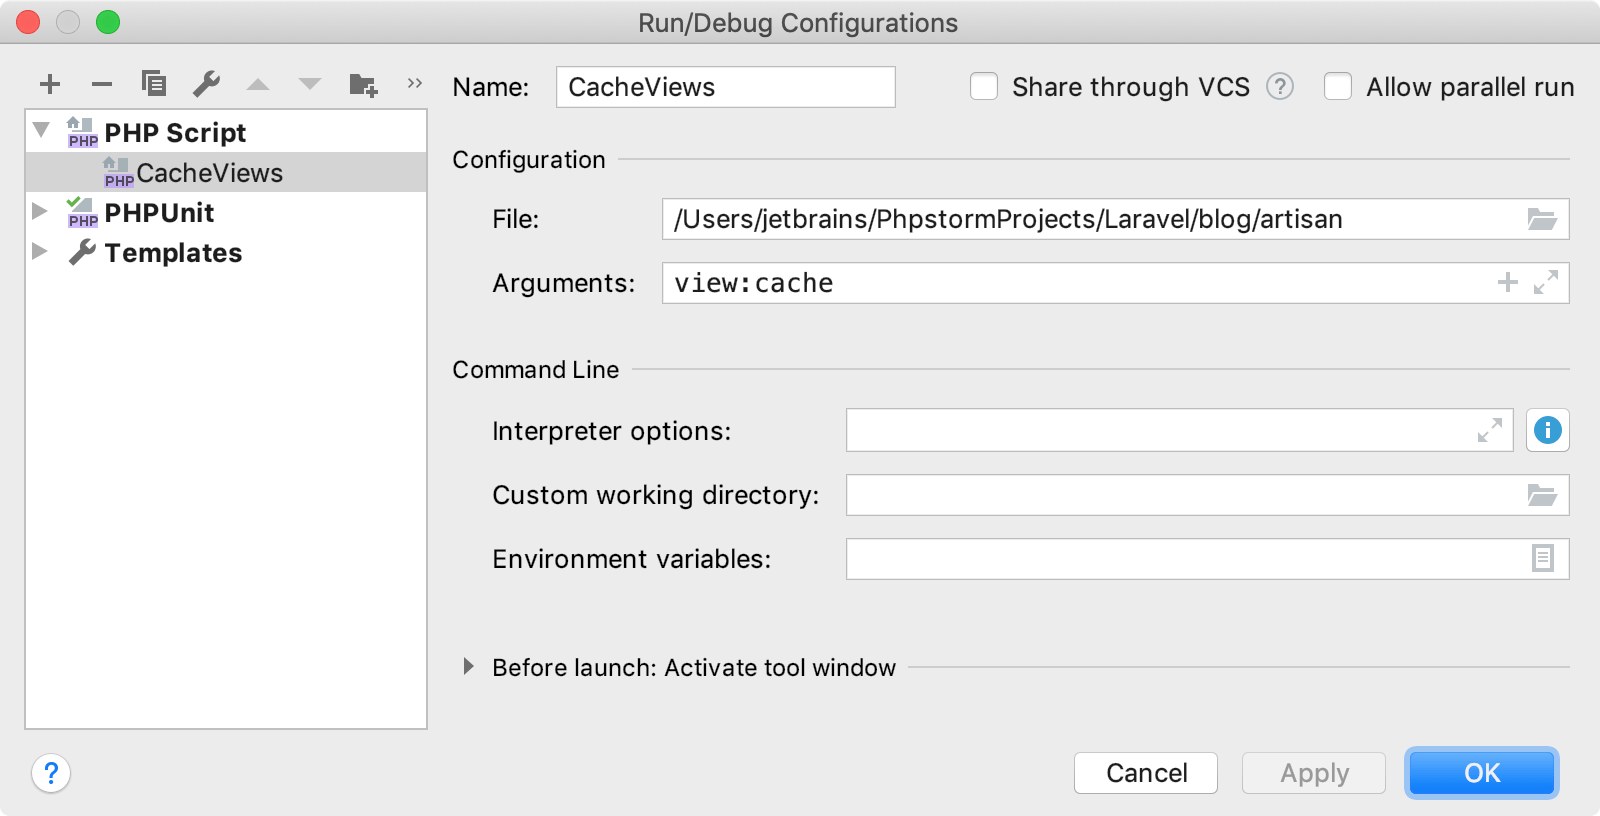
In the dialog, provide the run/debug configuration parameters.
In the File field, provide the path to the artisan executable file.
In the Arguments field, type the actual command and its arguments, such as
view:cache.
-
On the PhpStorm toolbar, select the created run/debug configuration and click
 . The command execution will stop at the specified breakpoint.