How To Claim Your MoneroV Coins (XMV)
AlesNow that the eagerly-awaited snapshot, taken at block height #1564965, is behind us, and MoneroV mainnet has just launched, the question on most everybody’s mind is: how do I get my shiny, newly minted MoneroV coins (XMV)? I'm going to address this in this step-by-step guide.

1. Determine, where you kept your moneros (XMR) at snapshot
How you will receive, or claim, your MoneroV coins (XMV), will depend on where you kept your moneros (XMR) at the snapshot time: on any of the supporting exchanges, in Monero’s official GUI/CLI desktop wallet, or in a web/cloud-based wallet, such as MyMonero.
A. You kept your XMR in a supporting exchange
At the time of snapshot, there have been 7 crypto-exchanges that have publicly pledged support for MoneroV fork. These include HitBTC (top-tier exchange in terms of average daily XMR trading volume), CoinEx, Coinroom, BTC-alpha, Octaex, Ovis and Crex24. Many other exchanges were and are waiting on the sidelines, and some will join the bandwagon post-fork.
If you kept your XMR in either of these exchanges, congrats! There’s nothing more you need to do. Exchanges will in due course, and according to their own schedules, both credit you with your MoneroV coins (at the rate of 10 XMV per XMR, including fractions thereof) and subsequently list XMV.
B. You kept your XMR in Monero’s GUI desktop wallet
If you followed MoneroV team’s recommendation and kept your XMR in Monero’s official GUI or CLI desktop wallet, what you will need to proceed to step 2 is either the 25-word long mnemonic seed or your wallet’s public address, private view key and private spend key. If you are an advanced user, you can also use .keys file.
If you don’t have them handy, log into your wallet, go to ’Settings’ tab and click on ’Show seed & keys’. Your mnemonic seed, public address and both private keys are located here. Found them? Copy them and proceed to step 2.
NB. If you opted to keep your XMR in a cold wallet like www.moneroaddress.org, the same applies. Have your mnemonic seed, or public address and both private keys, ready and proceed to step 2.
C. You kept your XMR in a web wallet like MyMonero
Most of you have, for its simplicity of use and to avoid having to sync your node with the Monero network, decided on using a MyMonero web wallet instead. While this is not the most privacy-conscientious decision, using a desktop wallet with a local node might have been somewhat of an overkill, if you only intend(ed) to keep XMR there for the snapshot.
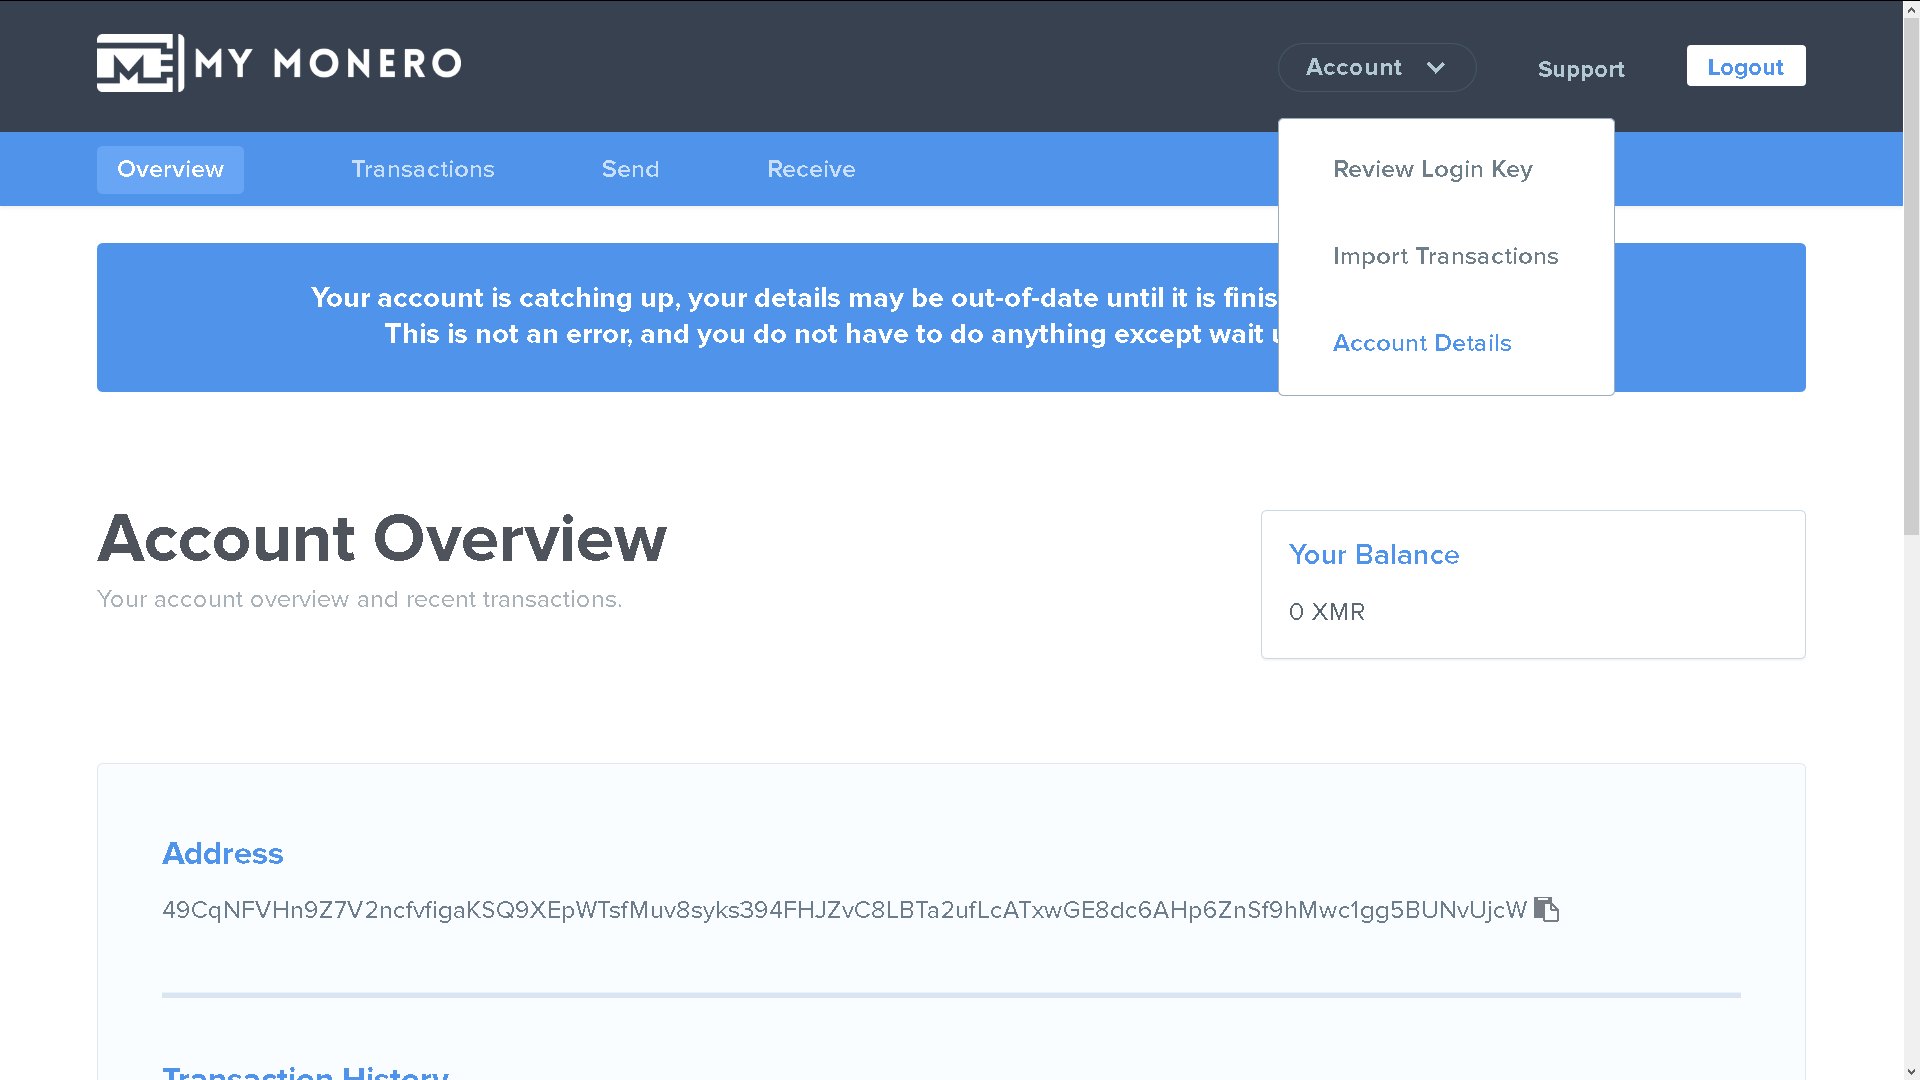
If you used MyMonero, login into your web wallet with a 13-word long private login key that you received (and, hopefully, wrote down during wallet-creation process). Once logged in, go to ’Account’ drop-down menu in the top right corner and click on ’Account Details’. Copy your wallet’s public address, private view key and private spend key. Have them? Proceed to step 2.
NB. In case your web wallet only provided a 13-word long mnemonic seed (as is the case with MyMonero’s private login key), you won’t be able to use this mnemonic seed to claim your MoneroV coins.
2. Move your XMR out of the ‘snapshot’ wallet
One of these fundamental security practices, that applies to not only this, but any fork, past or future, involves moving your XMR holdings from the wallet you kept them in at snapshot to another, fresh XMR wallet, a wallet that only you hold the mnemonic seed and private keys to, before you claim your MoneroV coins. This is strictly optional and in no way a prerequisite to claim your XMV, but may give you a peace of mind. So, if you haven’t done so yet, but would like to, now is high time to do so.
Remember: you will claim your XMV using the credentials of the XMR wallet in which you kept your XMR at the time of snapshot, and not the wallet you hold your XMR at the time of claiming your MoneroV coins. All clear? Let’s proceed then.
3. Claim your MoneroV coins (XMV)
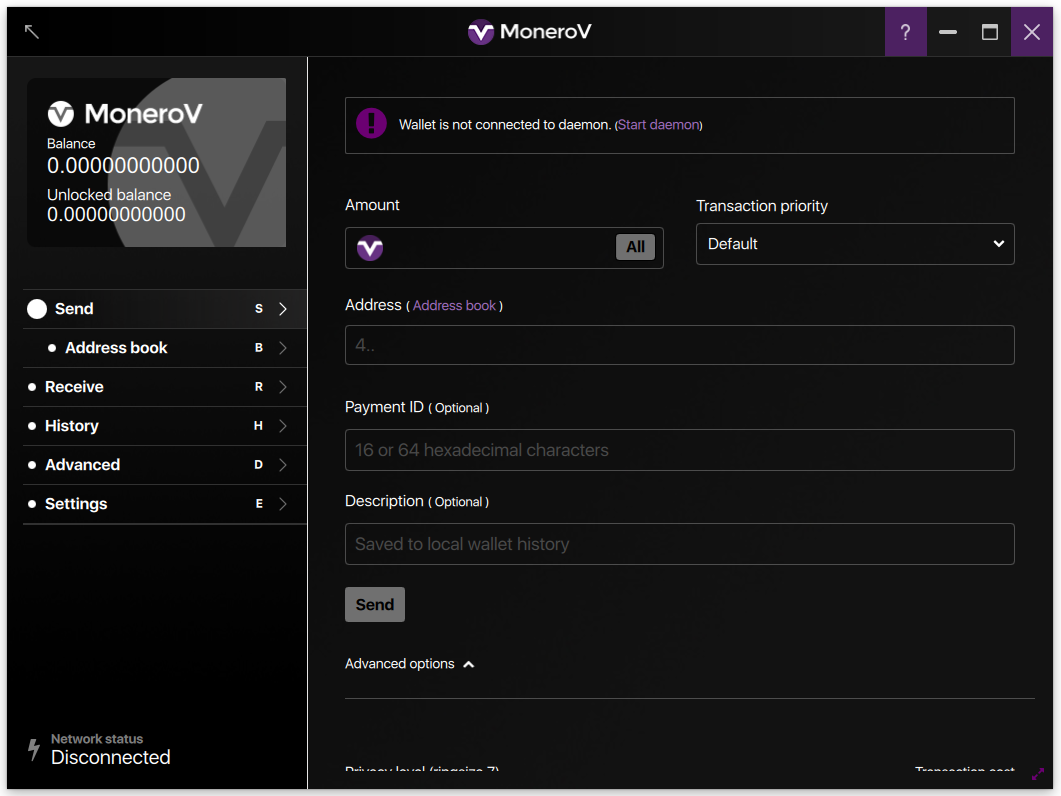
Shortly after the mainnet launch MoneroV’s official GUI desktop wallet has become available for download. ONLY TRUST the wallet you will find on the official MoneroV website. Numerous scamming and phishing attempts are bound to pop up in the following days.
You will notice that MoneroV’s official GUI desktop wallet is virtually identical to Monero’s desktop wallet. If you’ve used that as your Monero wallet, this is going to be a breeze. And even if you’ve used a web or mobile wallet, this is super simple. Absolutely nothing to fret about!
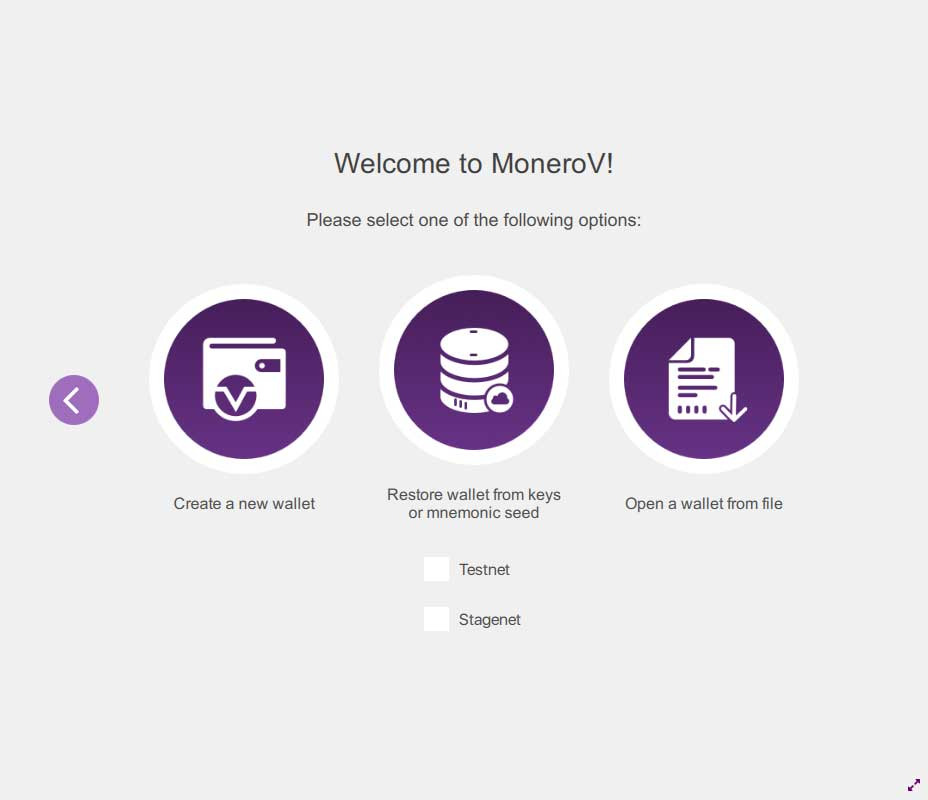
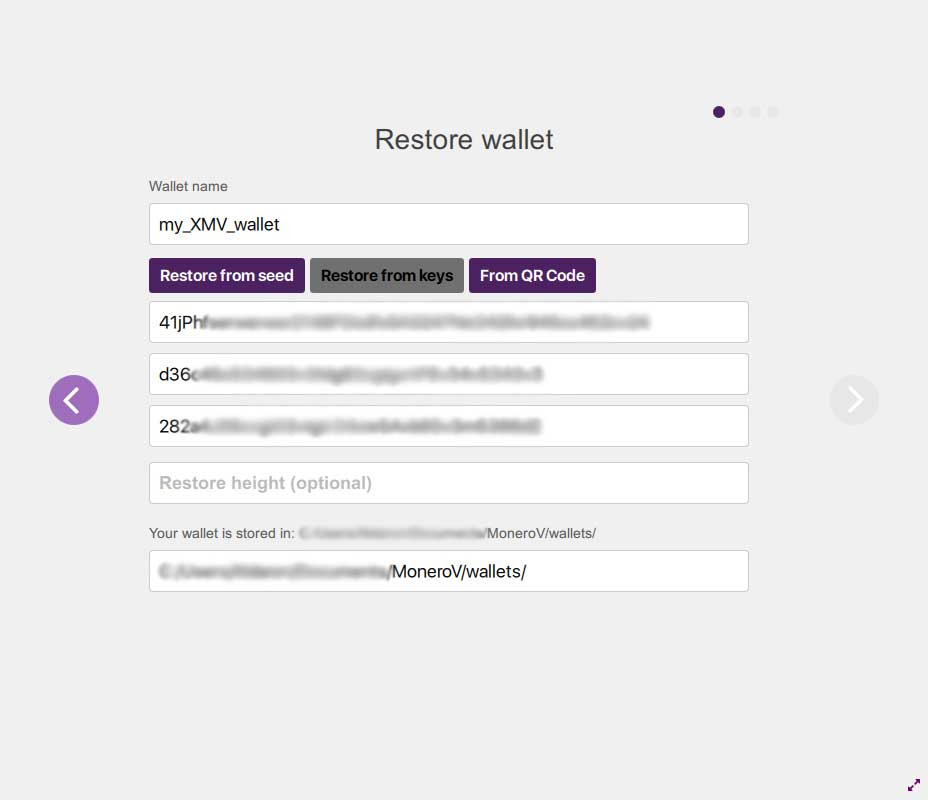
After downloading the wallet and launching it, you will be presented with three options to choose from. Choose the second one, i.e. ’Restore wallet from keys or mnemonic seed’. Advanced users, who know what the .keys file is and have saved it during Monero wallet’s creation, may choose ’Open a wallet from file’ and take that route. We assume these users are well-enough versed with the desktop wallet to be able to proceed on their own.
Assuming you have chosen the suggested option in the previous screen, you will (just like in Monero’s official GUI wallet) be prompted to enter your new MoneroV wallet’s name and storage location. This is also where you will enter your Monero wallet’s credentials. You can choose to restore wallet from the mnemonic seed or from a set of keys. Choose ’Restore from seed’ only if you have a 25-word long mnemonic seed available. Otherwise, choose ’Restore from keys’. Fill in all the non-optional field(s) and proceed to the next screen.
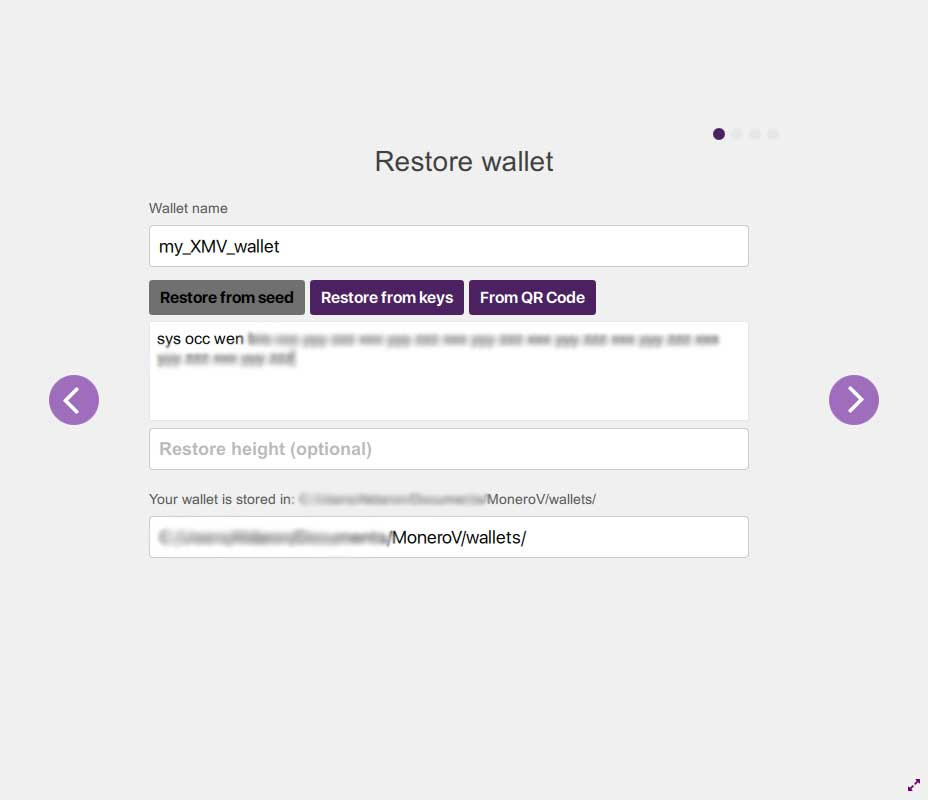
NB. If you have opted to use the mnemonic seed, you are free to enter only the first three letters of each seed word to save a bit of time.
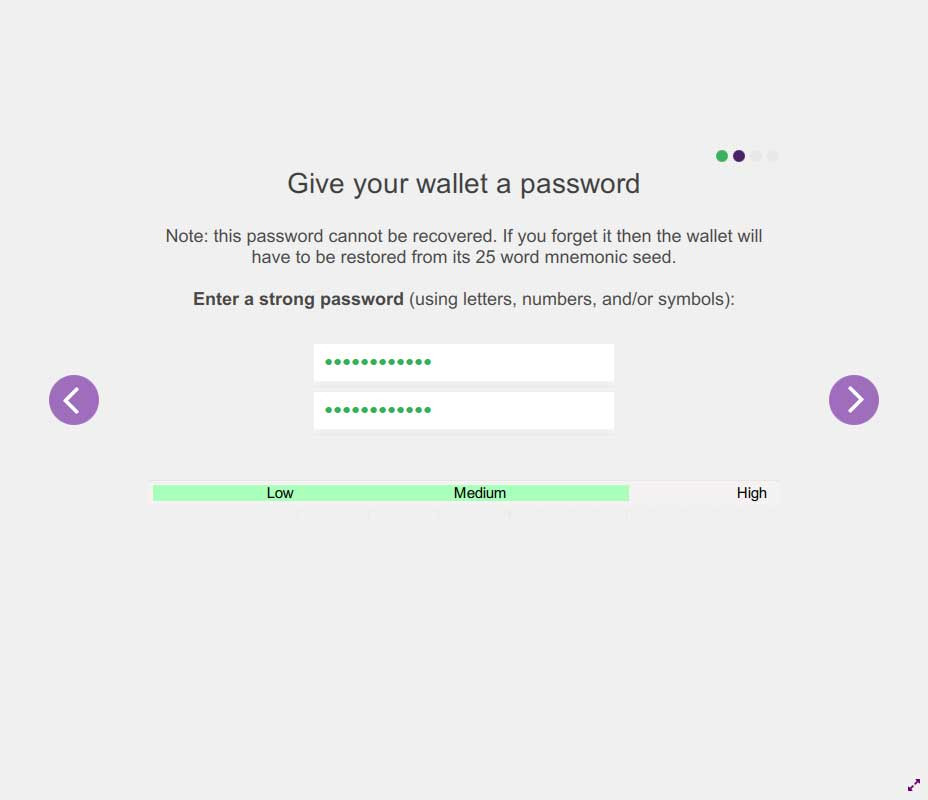
Enter as strong a password as you can think of in the next screen.
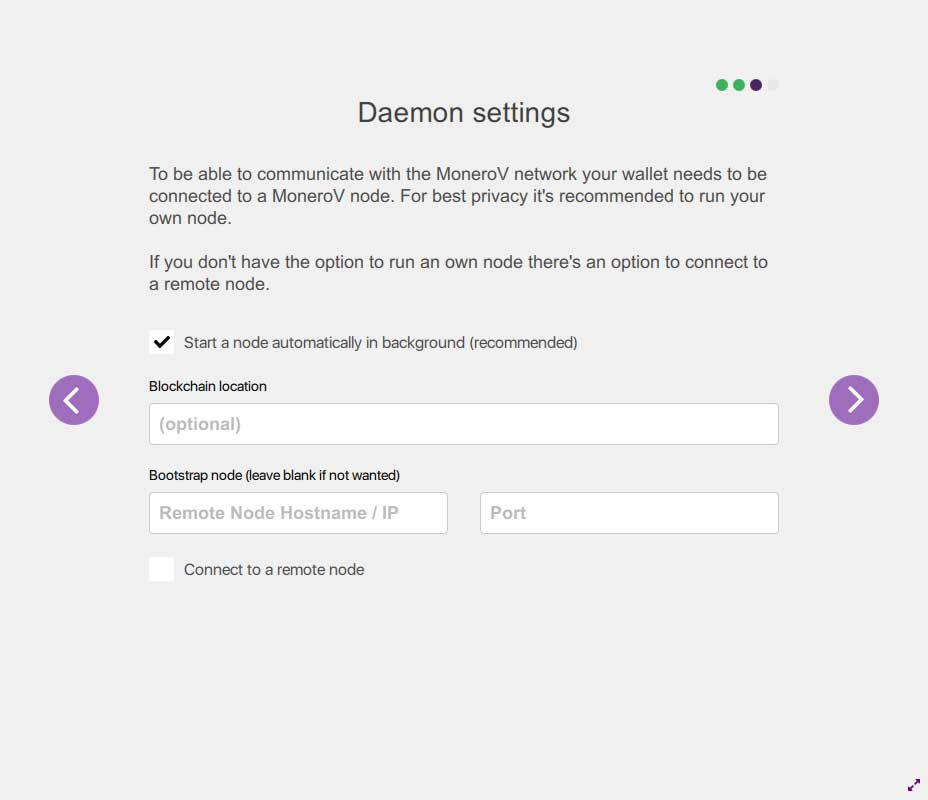
Now, all that’s left to do is confirm daemon settings. For the time being, leave the recommended ’Start a node automatically in the background’ option checked (as remote nodes are not yet available for MoneroV network) and proceed to the final screen.
Review your settings (make sure you are connected to the mainnet!) and click ’Use MoneroV’ in the bottom right corner of the screen to access your wallet.
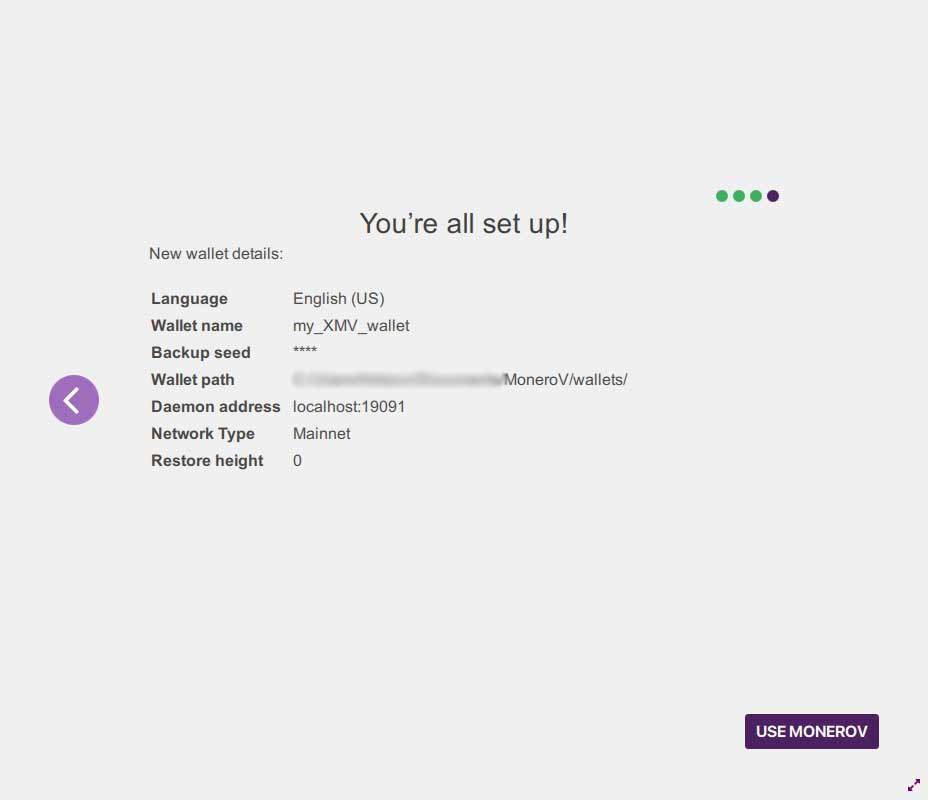
And you’re DONE! Your shiny, newly minted MoneroV coins (XMV) are waiting for you there. Of course, you will only see them after your wallet fully synchronizes with the network.